ASA form filling
GenAuth Secure Authentication (ASA) is a feature developed by GenAuth that provides single sign-on (SSO) for external web applications that do not support standard authentication protocols (OAuth2.0, OIDC, SAML, CAS).
Administrators can assign application accounts and passwords to users. GenAuth stores the account and password in encrypted form in the database. When a user accesses the login interface of an application to which an account and password are assigned, GenAuth will automatically fill in the account and password and log in. End users only need to log in to GenAuth to directly access the assigned application.
How to use
Create an ASA application
Find an application that supports ASA in the GenAuth application market. Below we take "Shimo Document" as an example for demonstration.
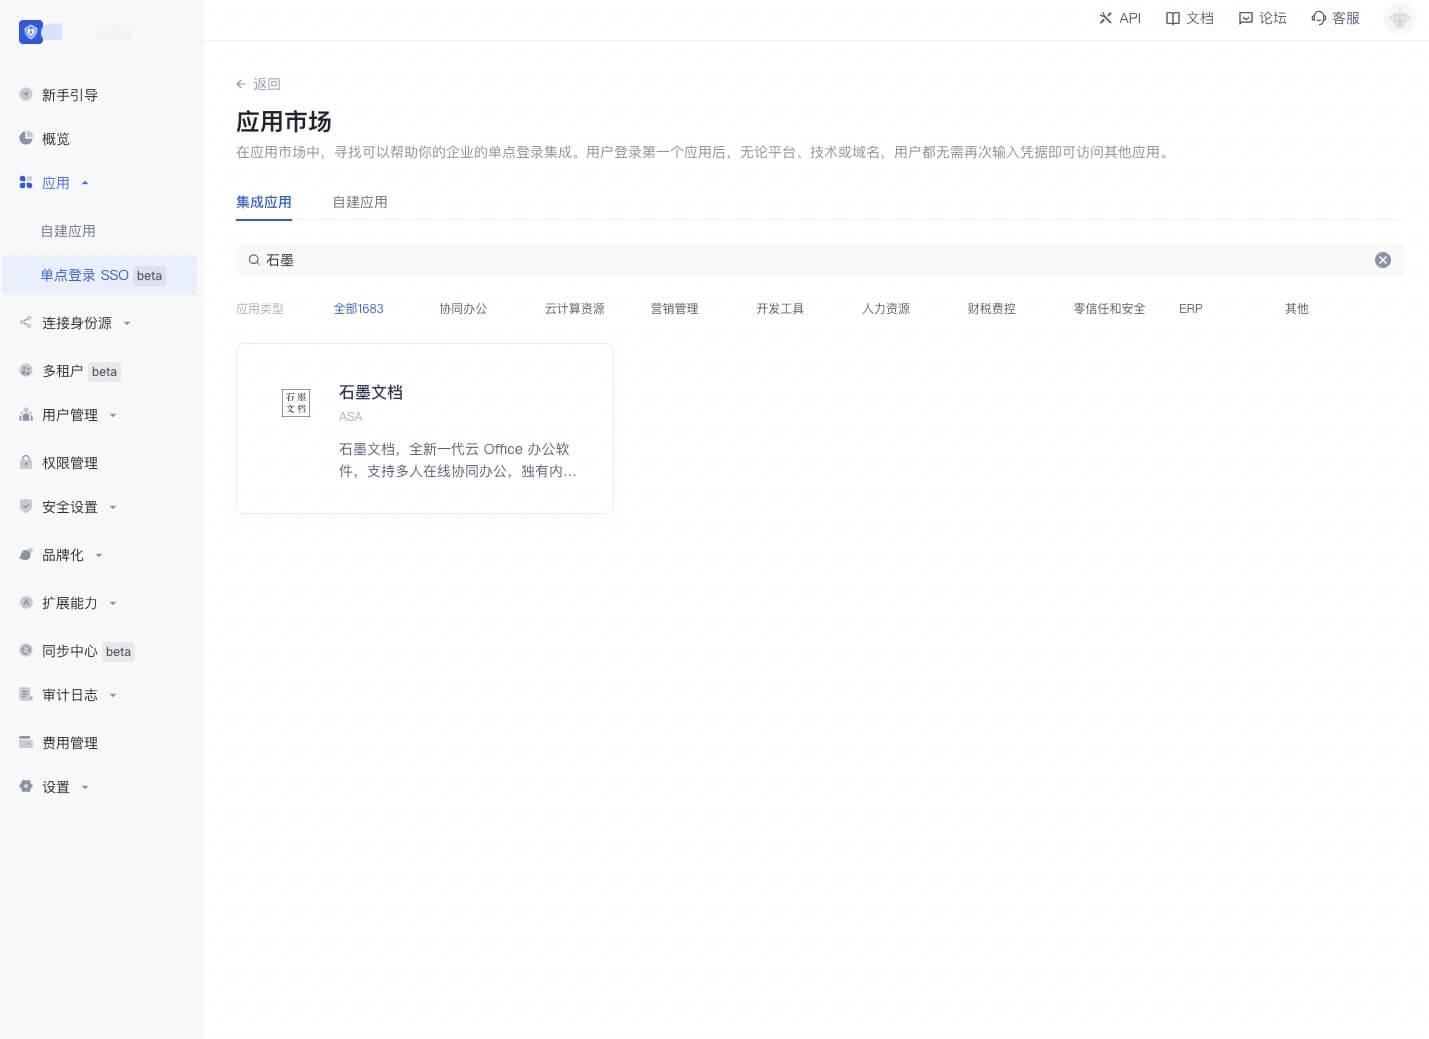
Click to enter the details, click "Get Application"
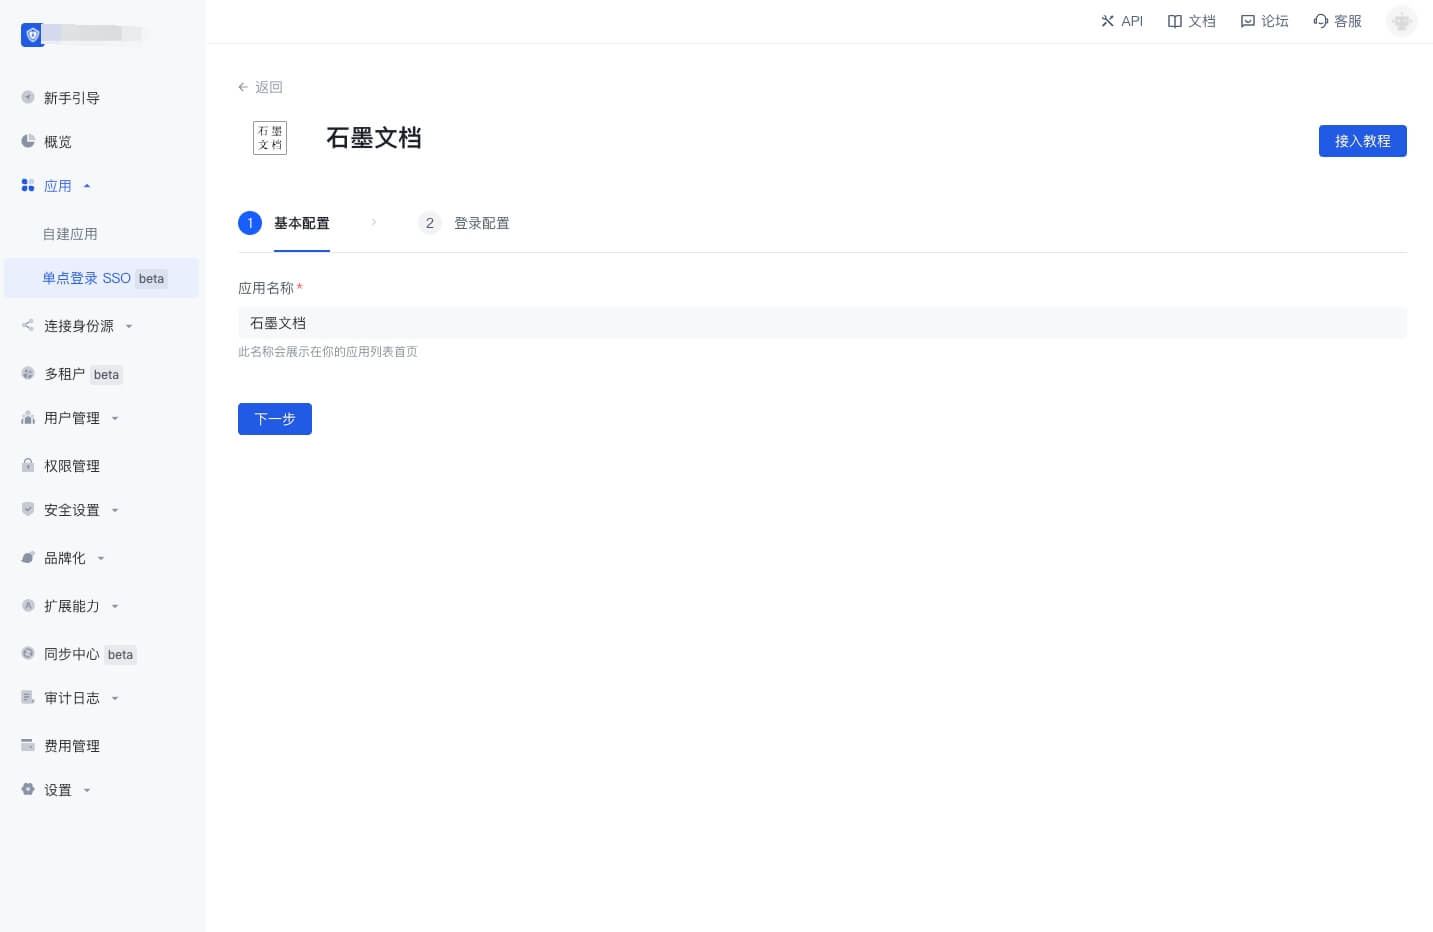
Fill in the application name, click "Next"
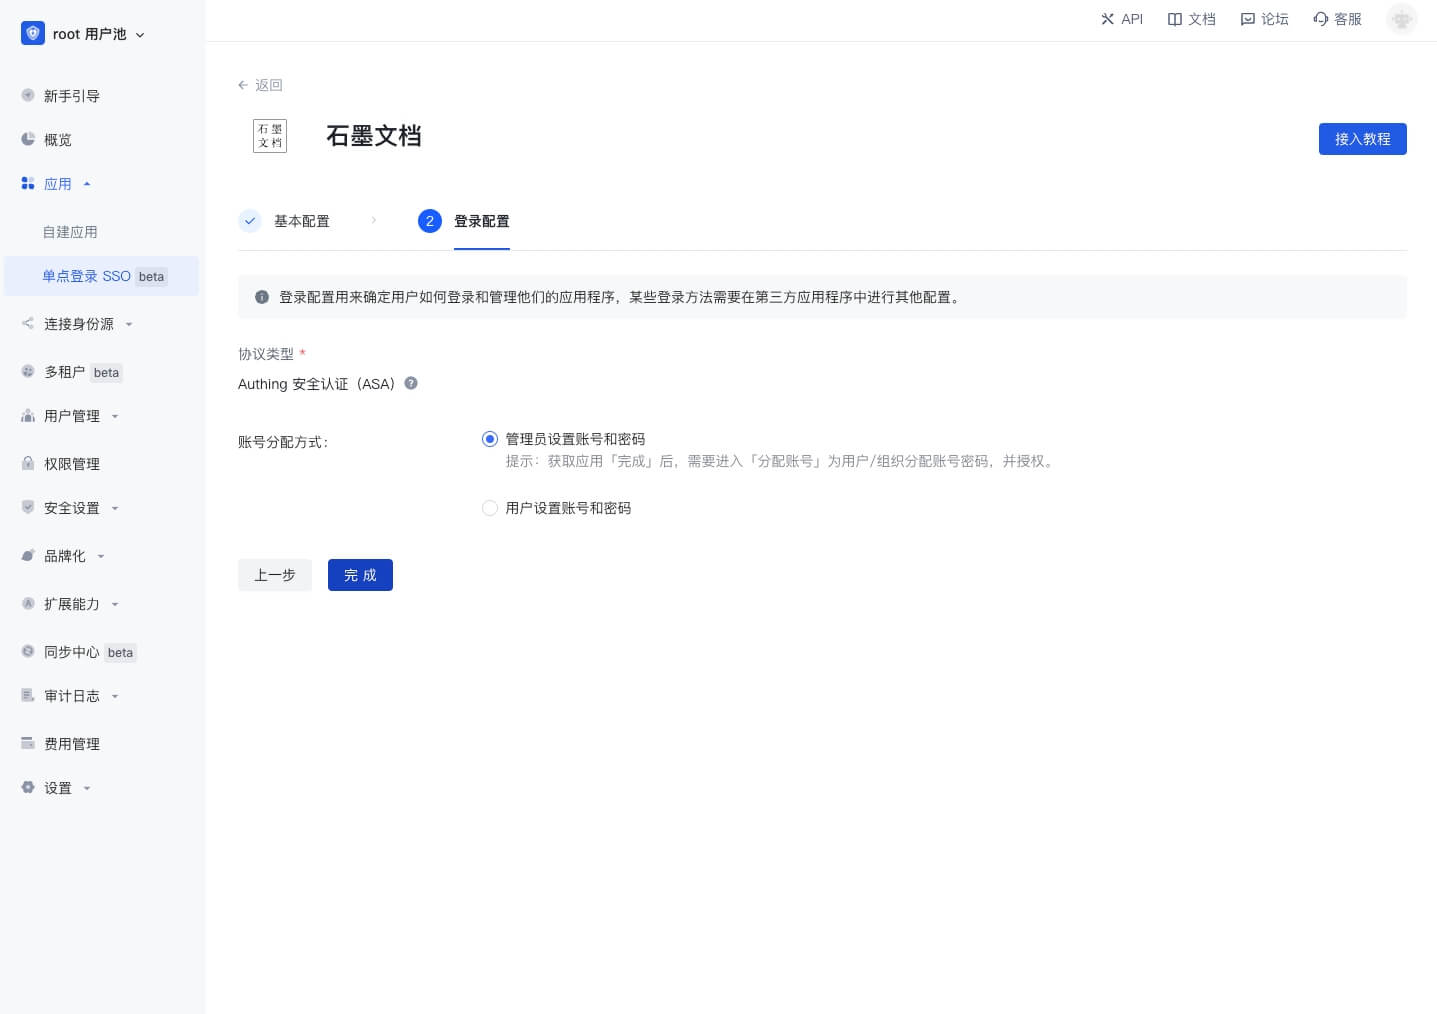
Click "Finish"
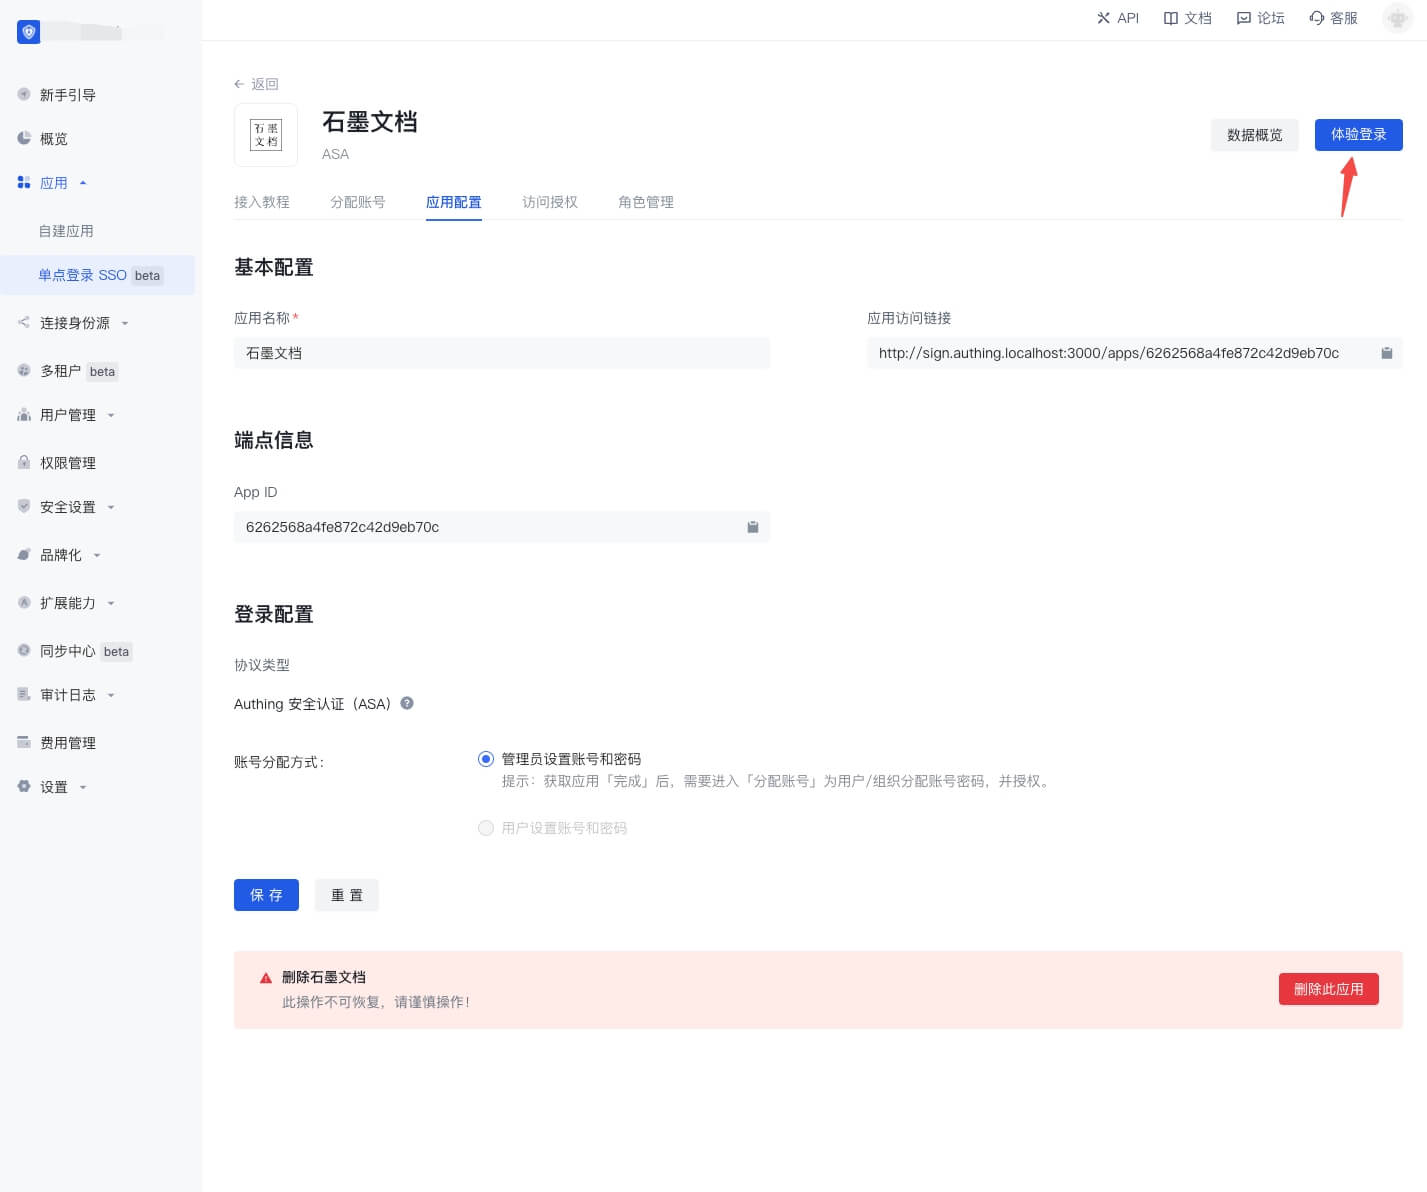
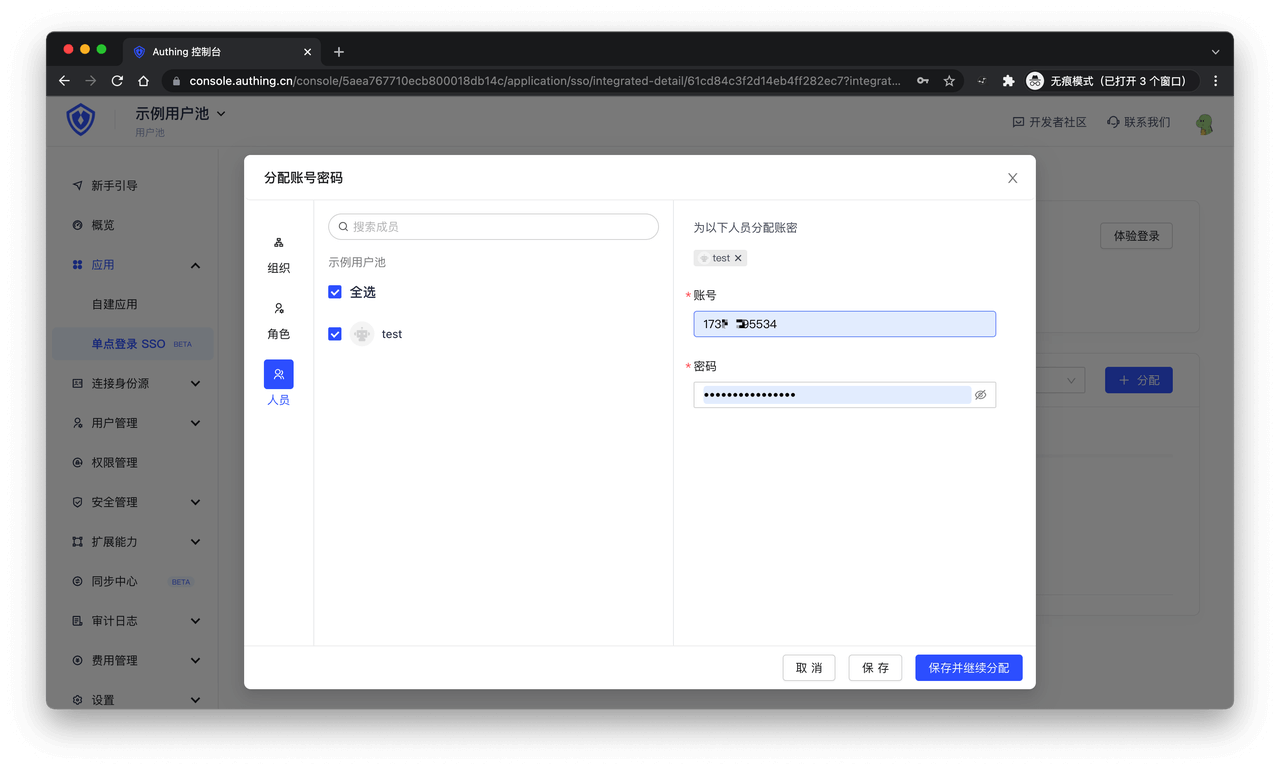
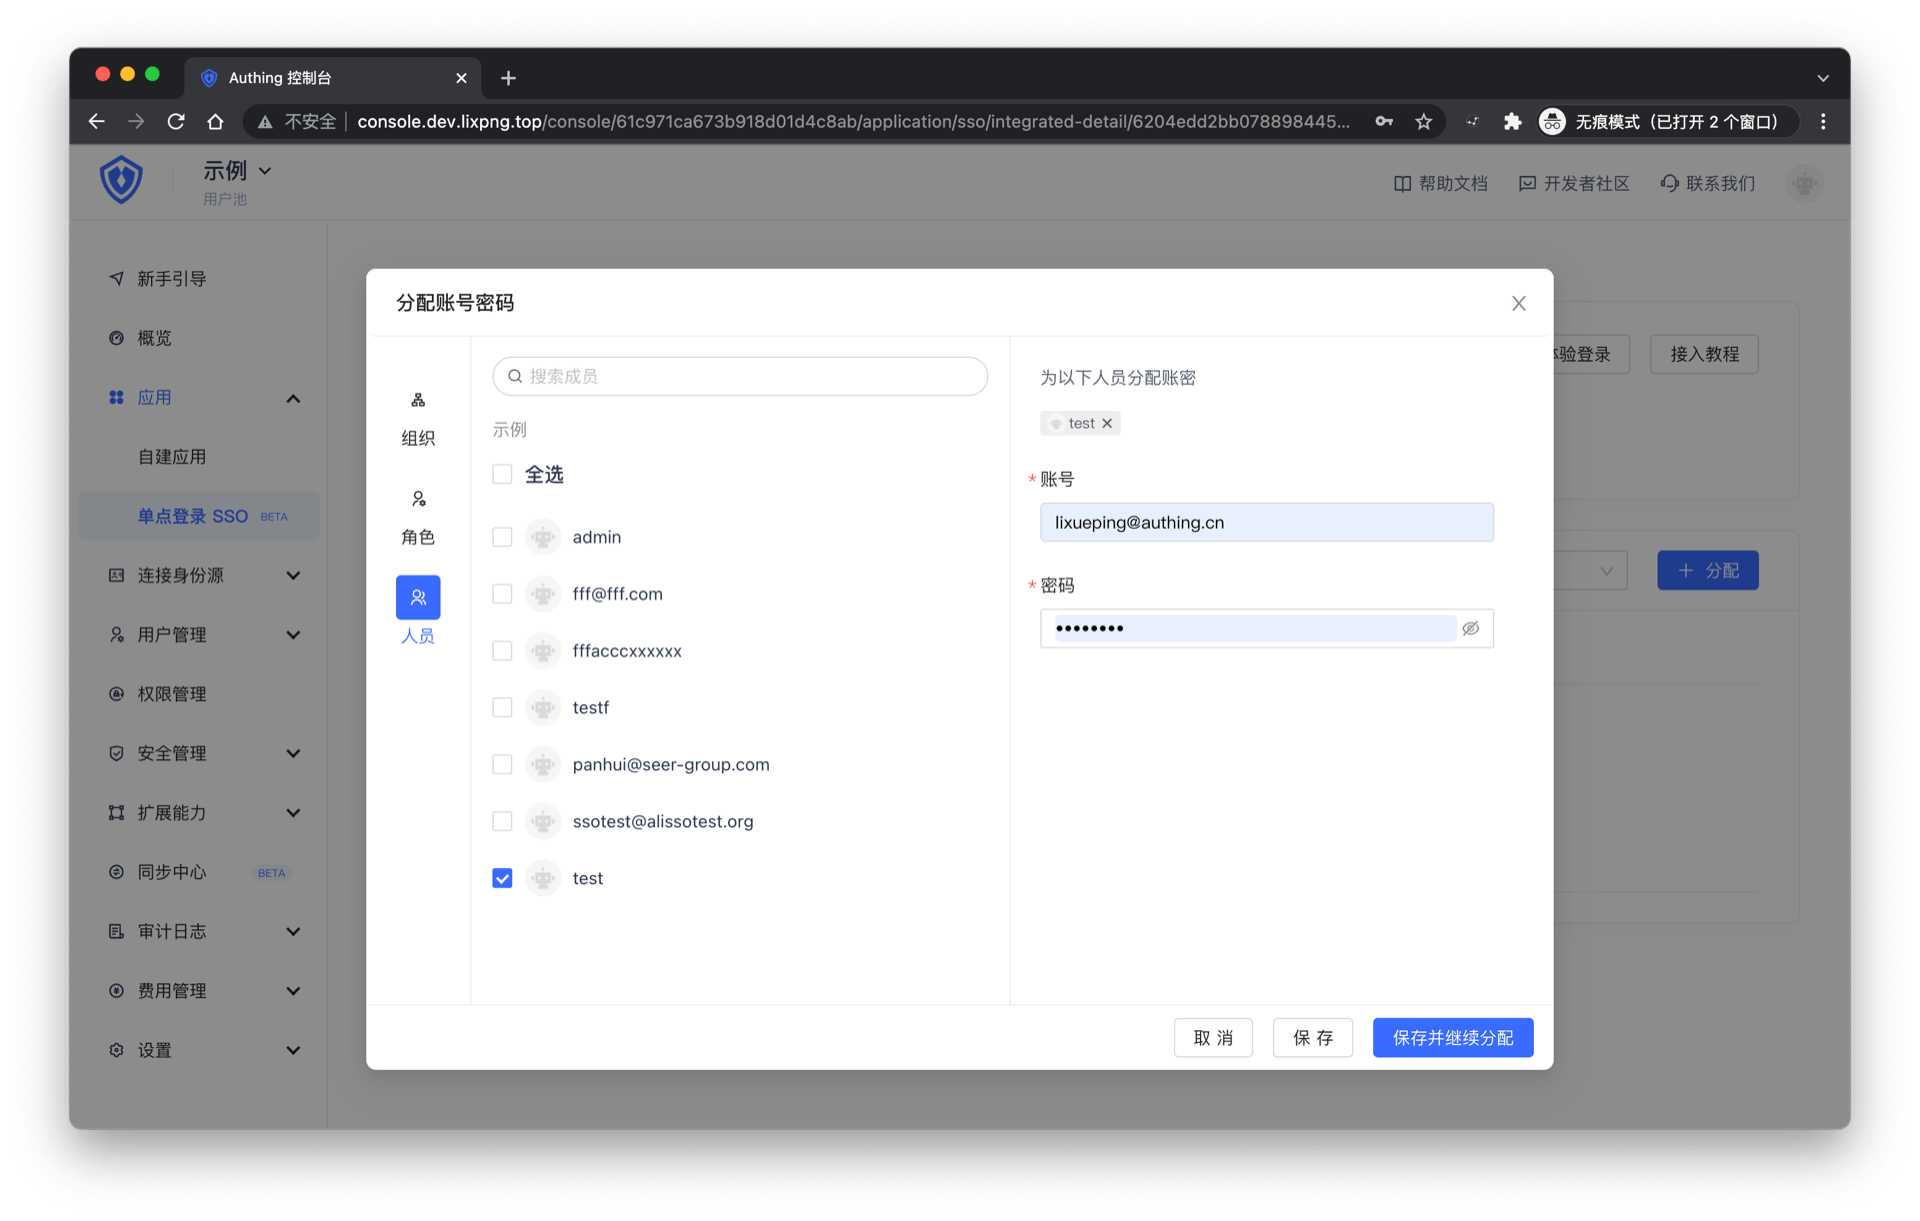
On the Account Assignment page, assign an application account to the user
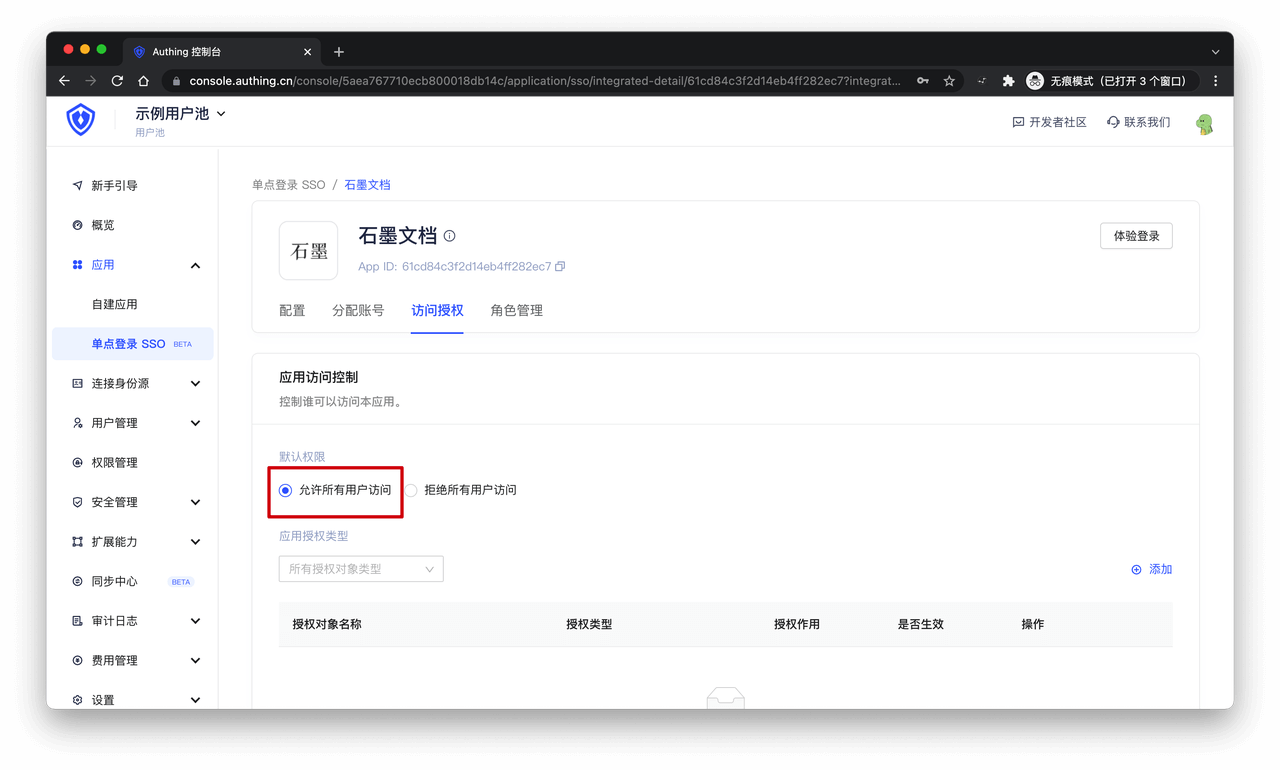
On the Access Authorization page, select "Allow all users to access"
Download the plug-in
End users need to download the browser plug-in to use ASA. The download list of browser plug-ins is as follows. If the browser you are using is not in the following list, please try to install the Chrome version of the plug-in:
| Browser | Instructions |
|---|---|
| Google Chrome |
|
| 360 Speed Browser | Go to App Center to download and install. You can use this plug-in after logging in to the GenAuth application panel |
| 360 Secure Browser | Go to App Center to download and install, and then log in to the GenAuth App Panel to use this plug-in |
| Firefox | Go to Extension Center to download and install, and then log in to the GenAuth App Panel to use this plug-in |
Experience login
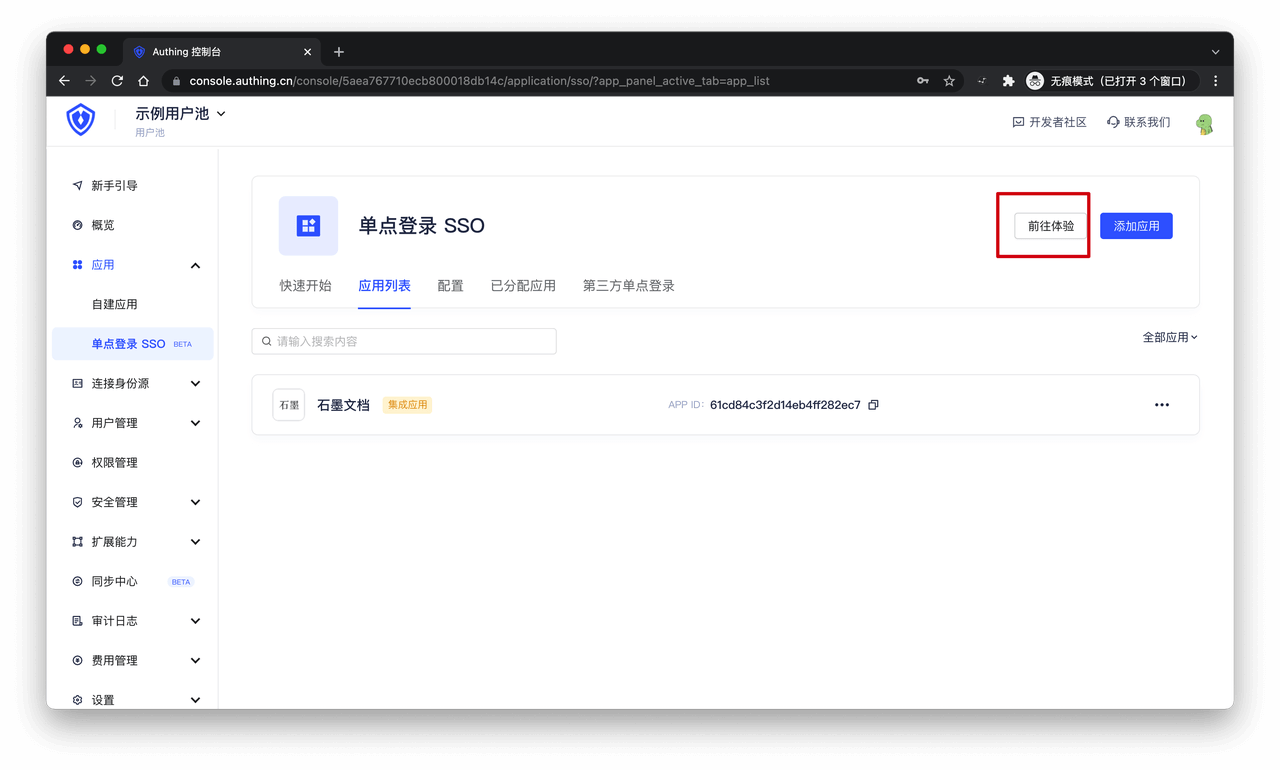
Click the "Go to Experience" button in the single sign-on application list to enter the GenAuth application panel login page.
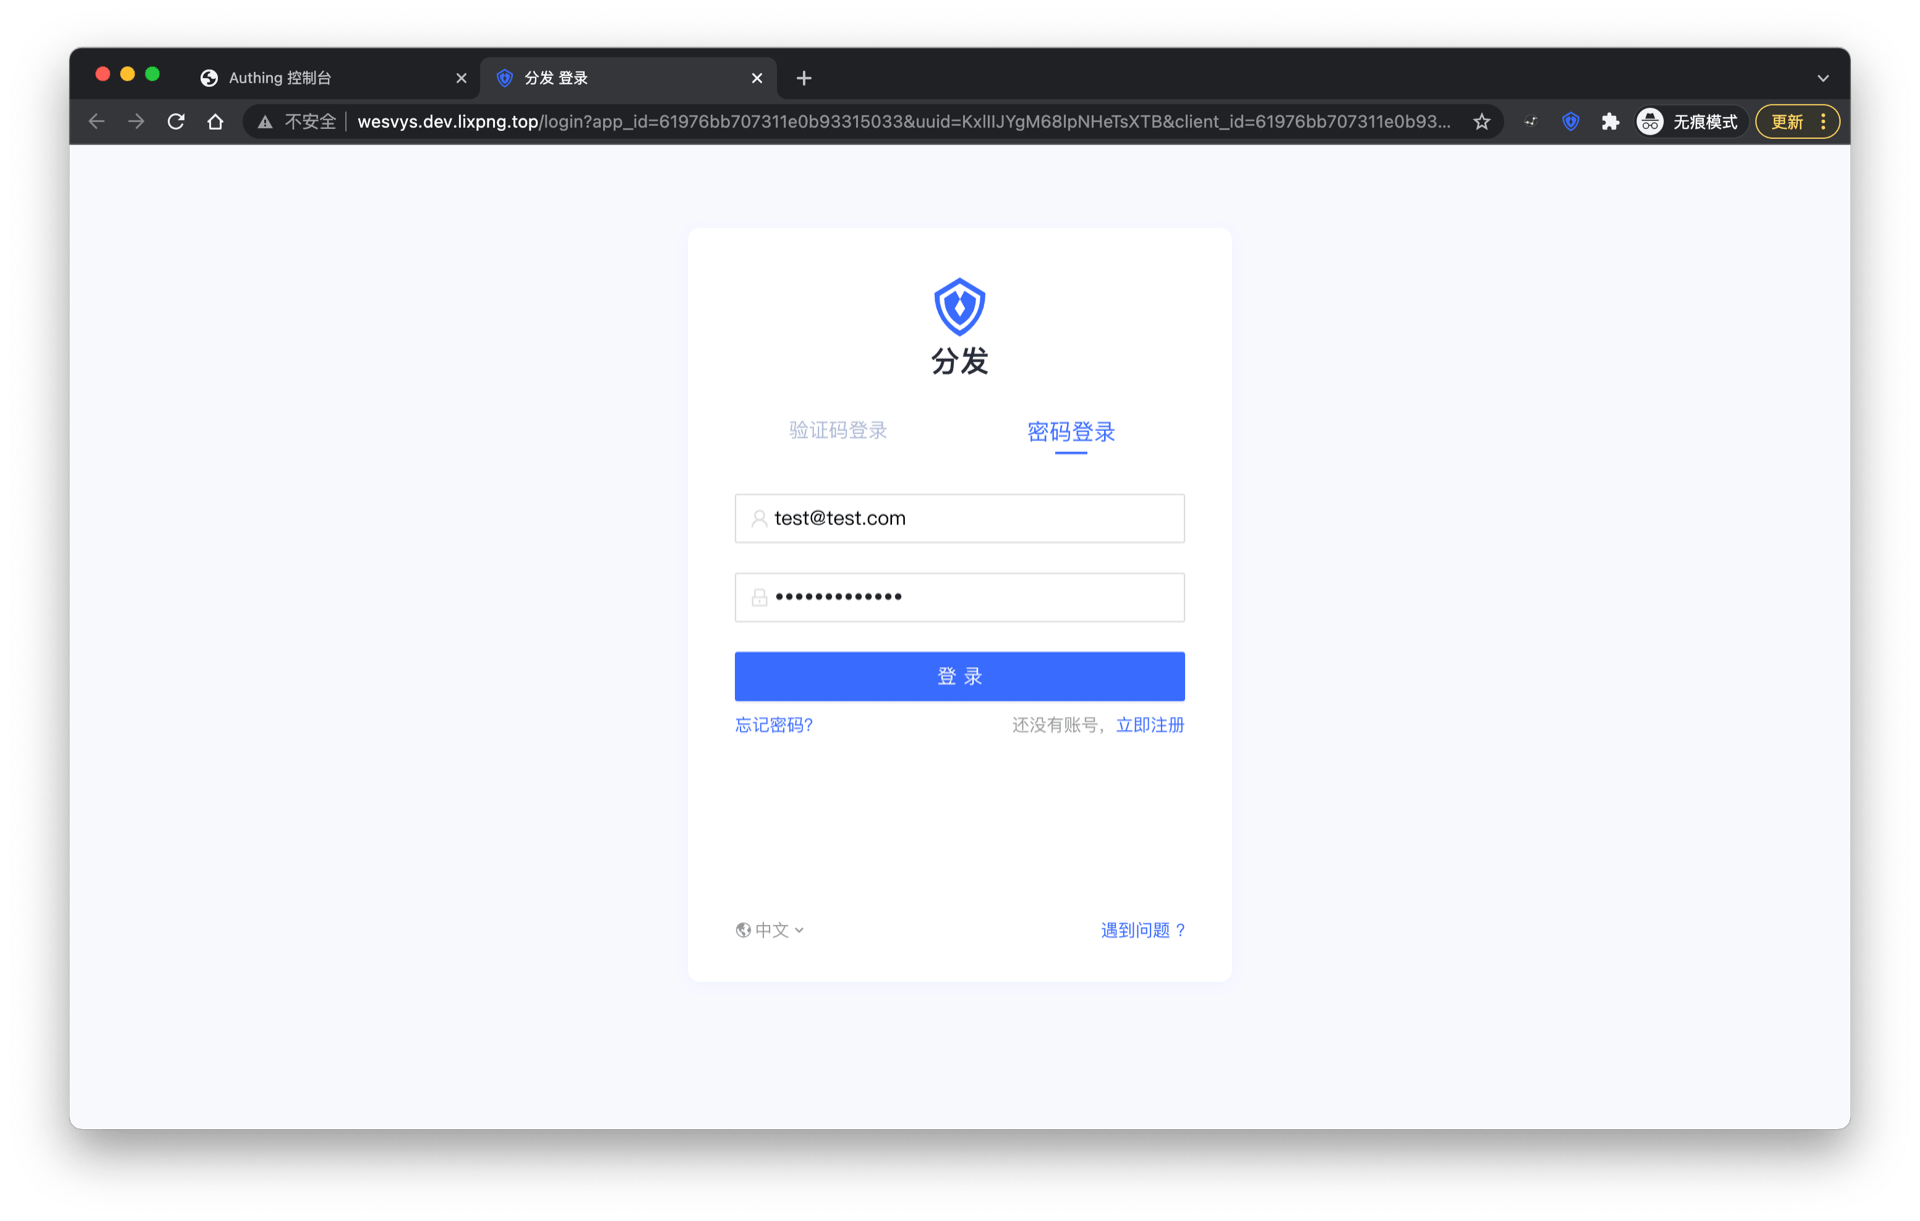
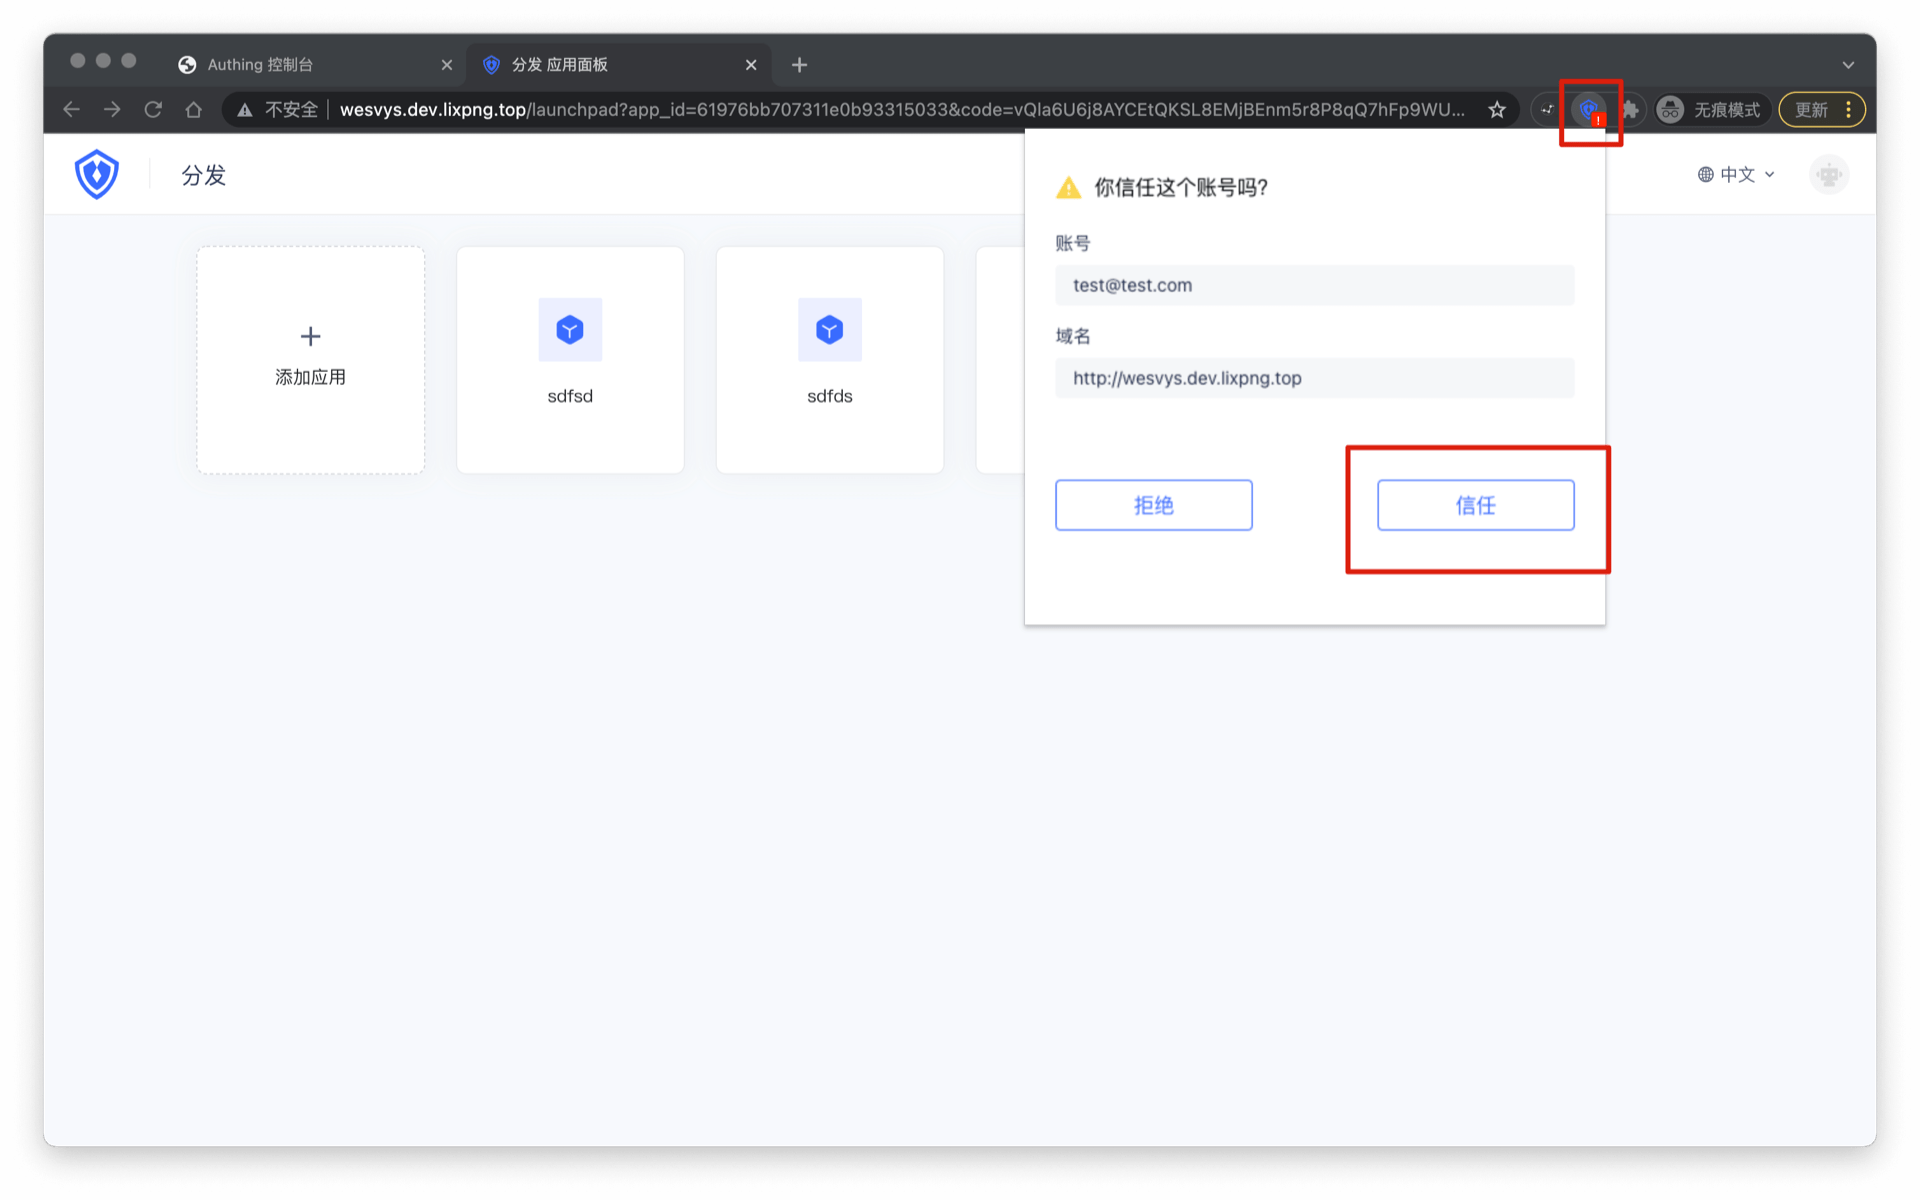
Enter the email and password of the user who was previously assigned an account, click "Login", and enter the application panel.
A red exclamation mark will appear on the plug-in icon. Click the "plug-in icon" to open the plug-in page and click "Trust" the current account.
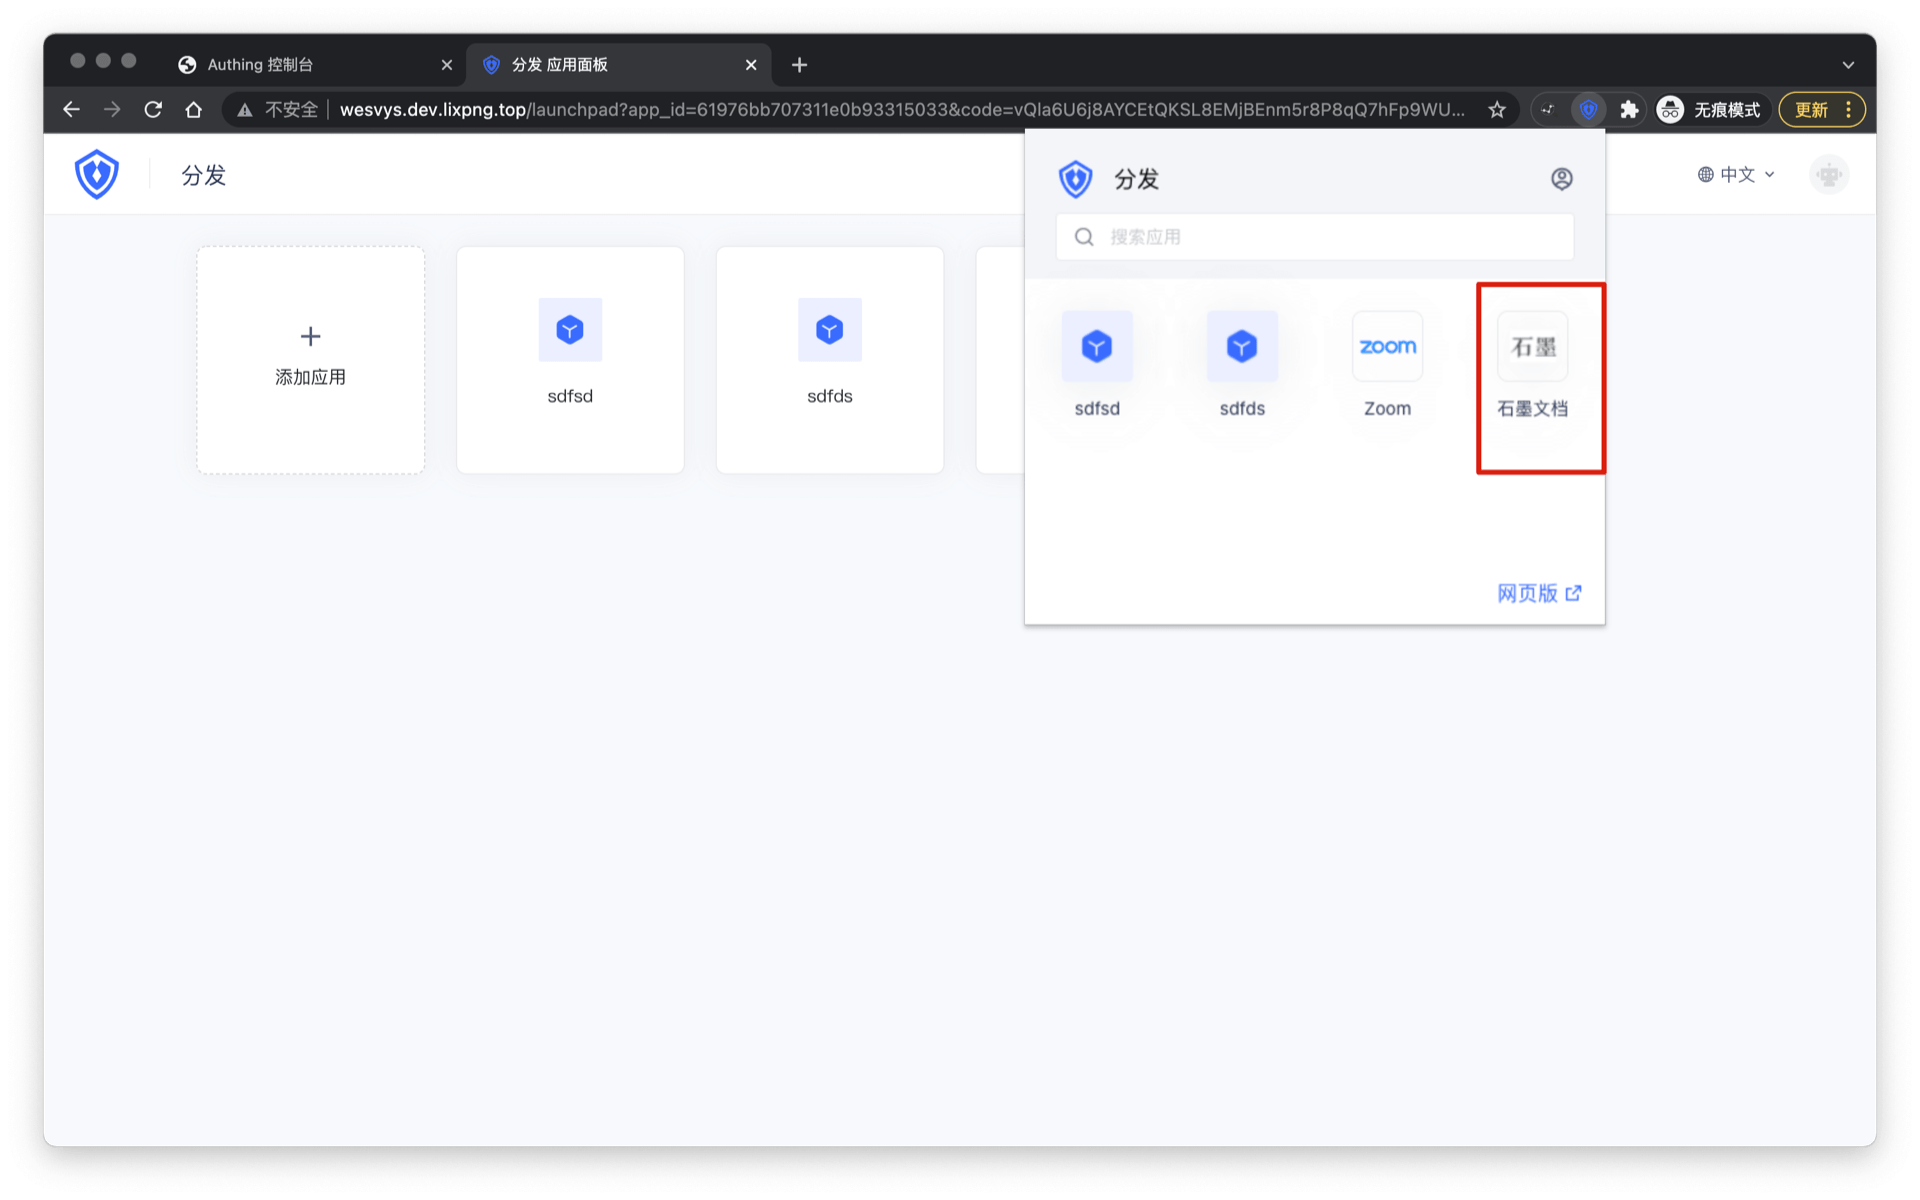
The plug-in will display a list of all applications assigned to the current account by the administrator, and you can see the "Graphite Document" you added previously.
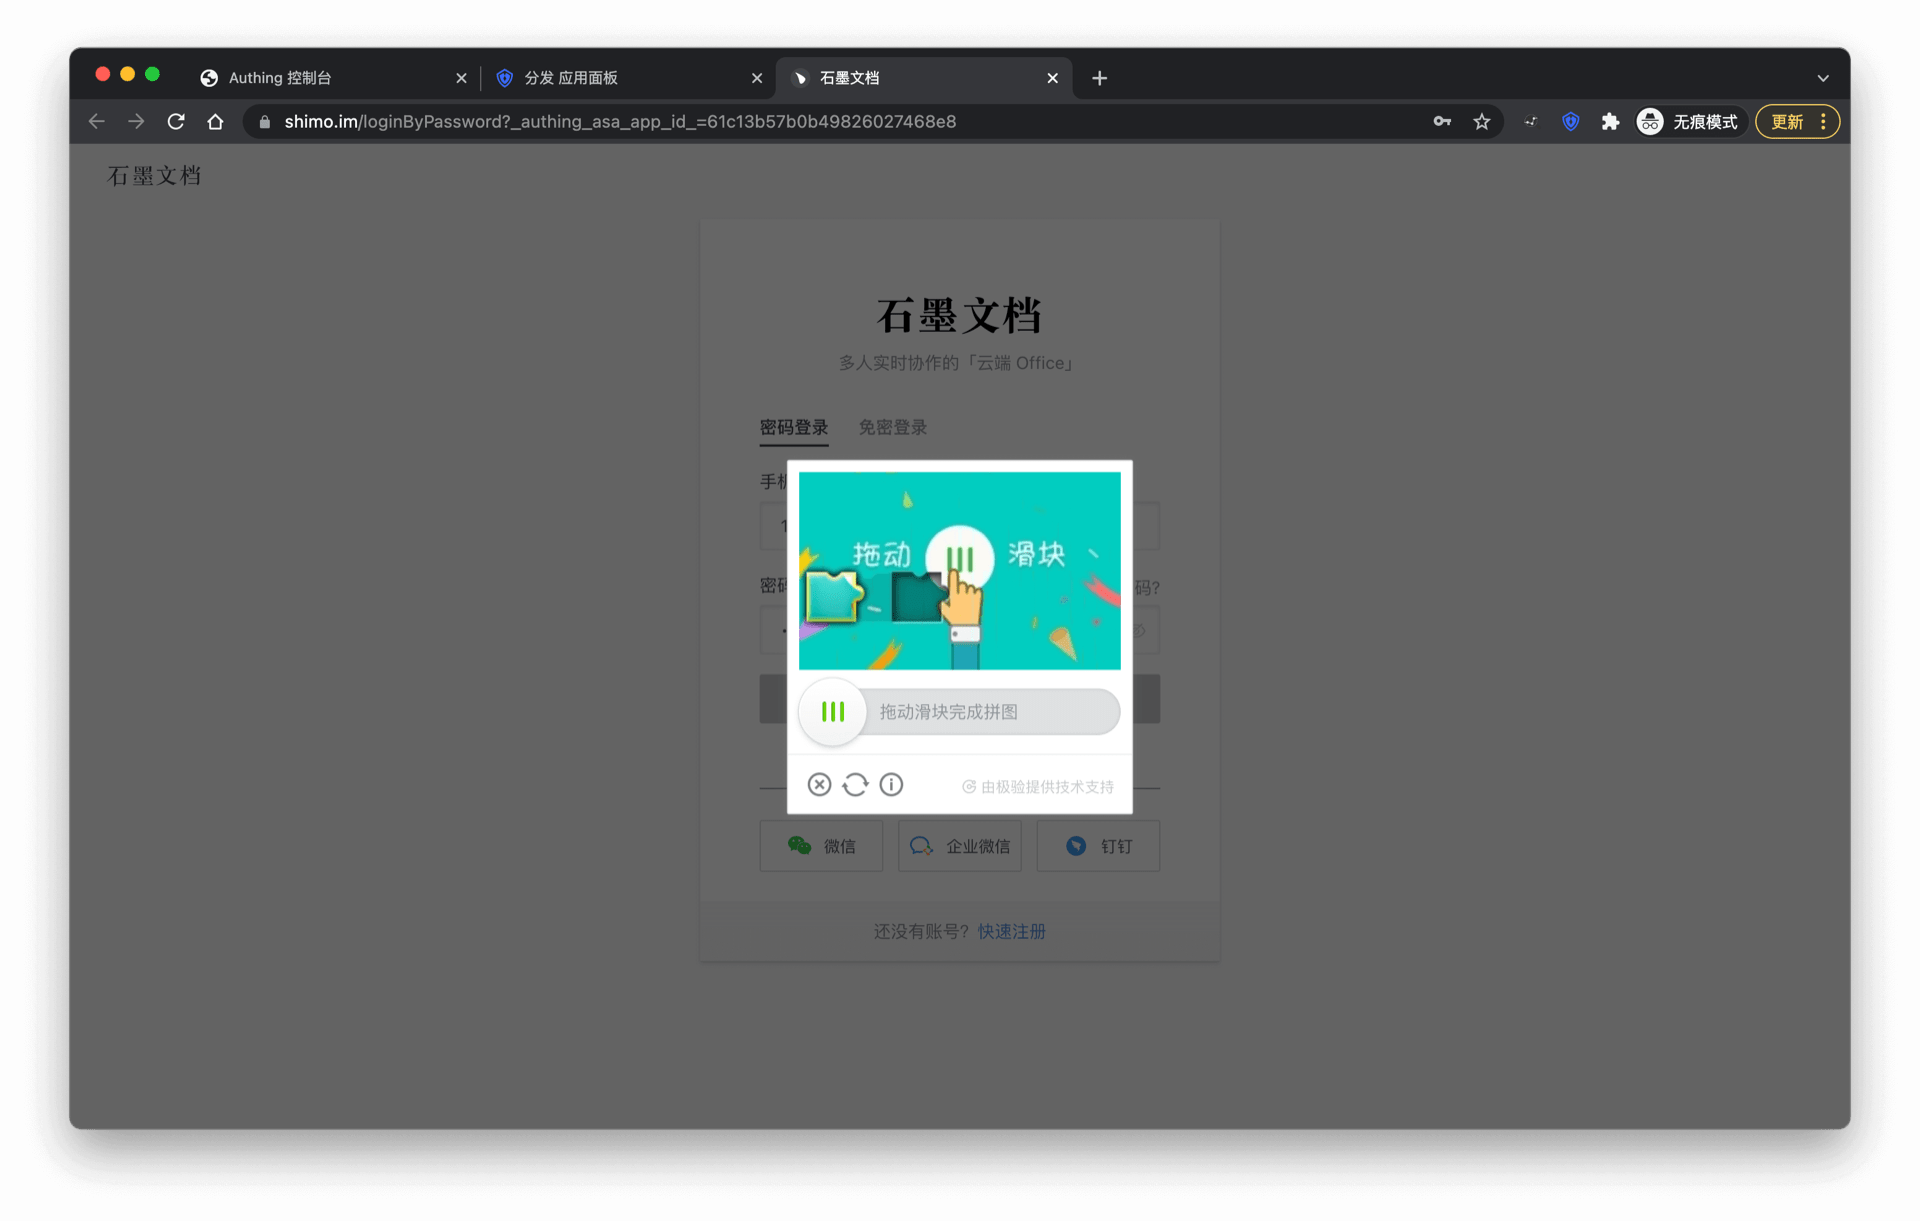
Enter the login interface of the corresponding application, and the GenAuth browser plug-in will automatically fill in the previously assigned account password and automatically log in. Sometimes the application needs to perform some human-computer verification, which requires manual operation by the user and cannot be skipped by the plug-in.
Login is successful when verification is completed.
We are accelerating the ASA plug-in to support more applications. If you want your application to be supported, you can learn more details in Join APN Overview.
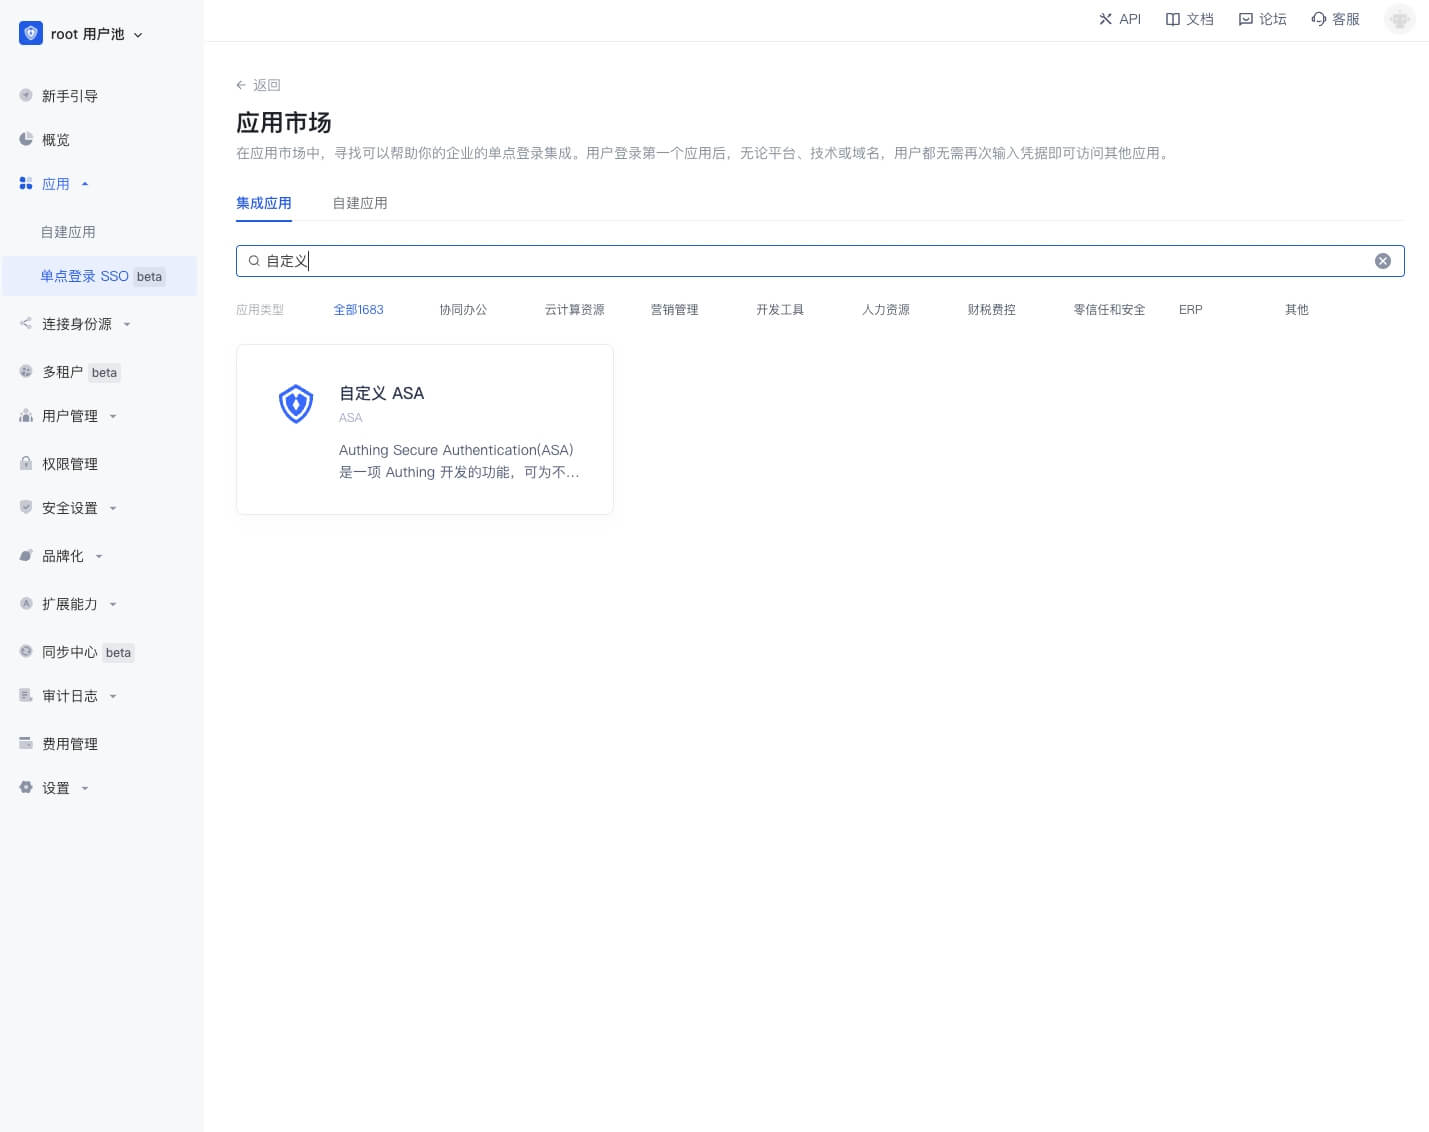
Custom ASA application
If you can't find the application you need in the application market, you can use a custom ASA application.
Create a custom ASA application
The following takes "Graphite Document" as an example. First, find Custom ASA application in the application market
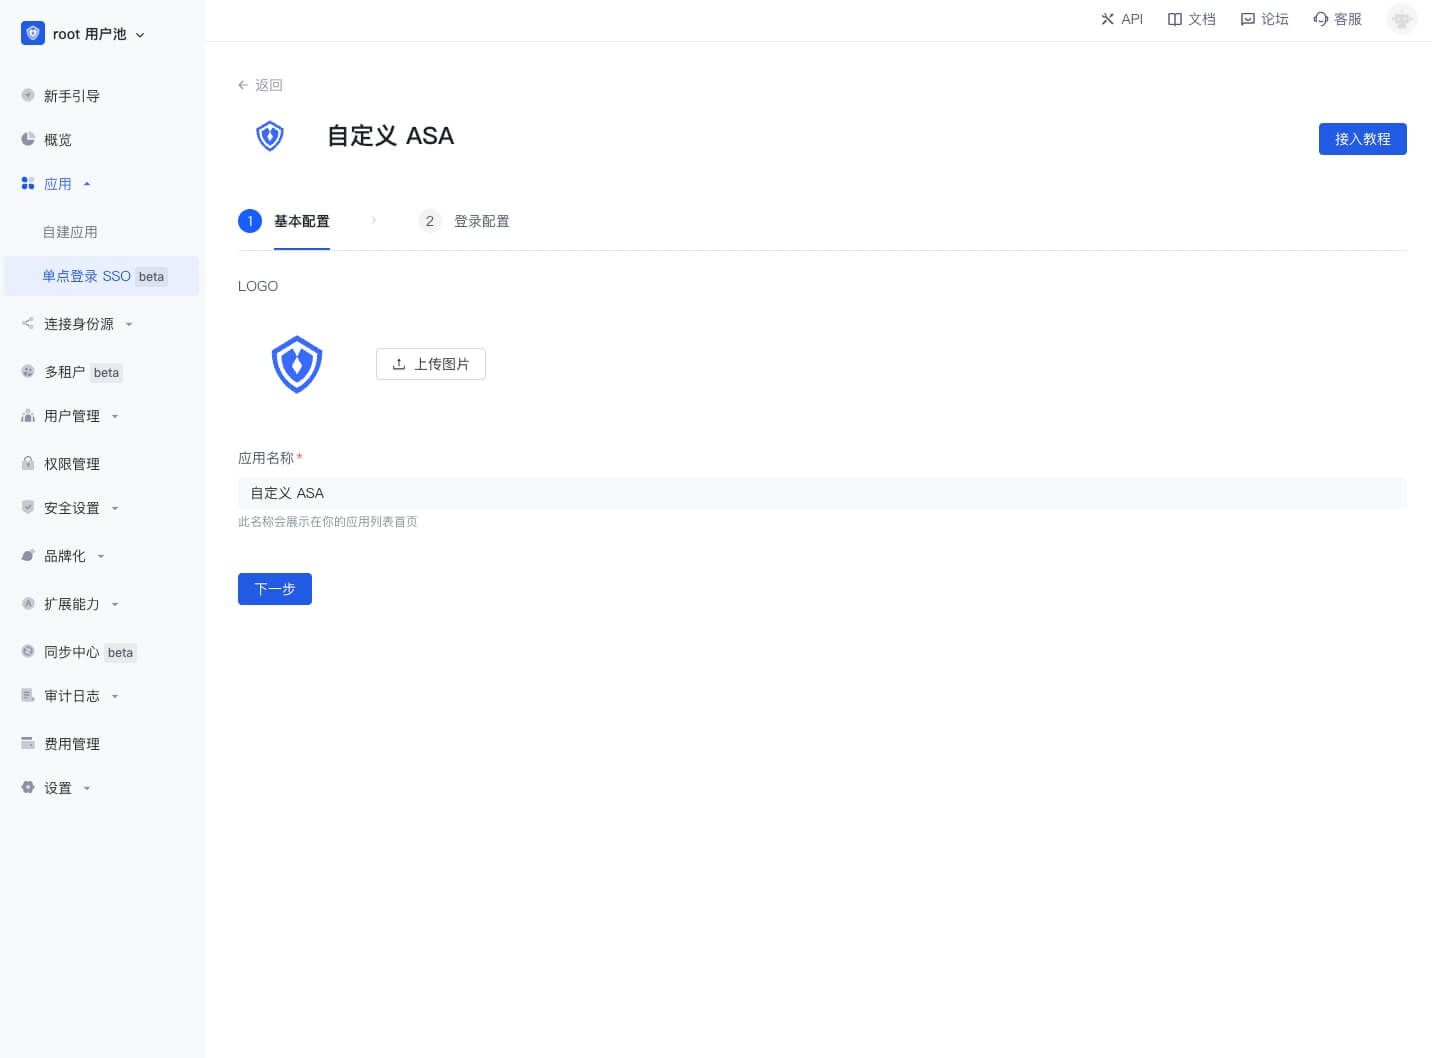
Click to enter the details, then click "Get application", enter the application configuration interface, upload the application logo, fill in the application name, and click "Next".
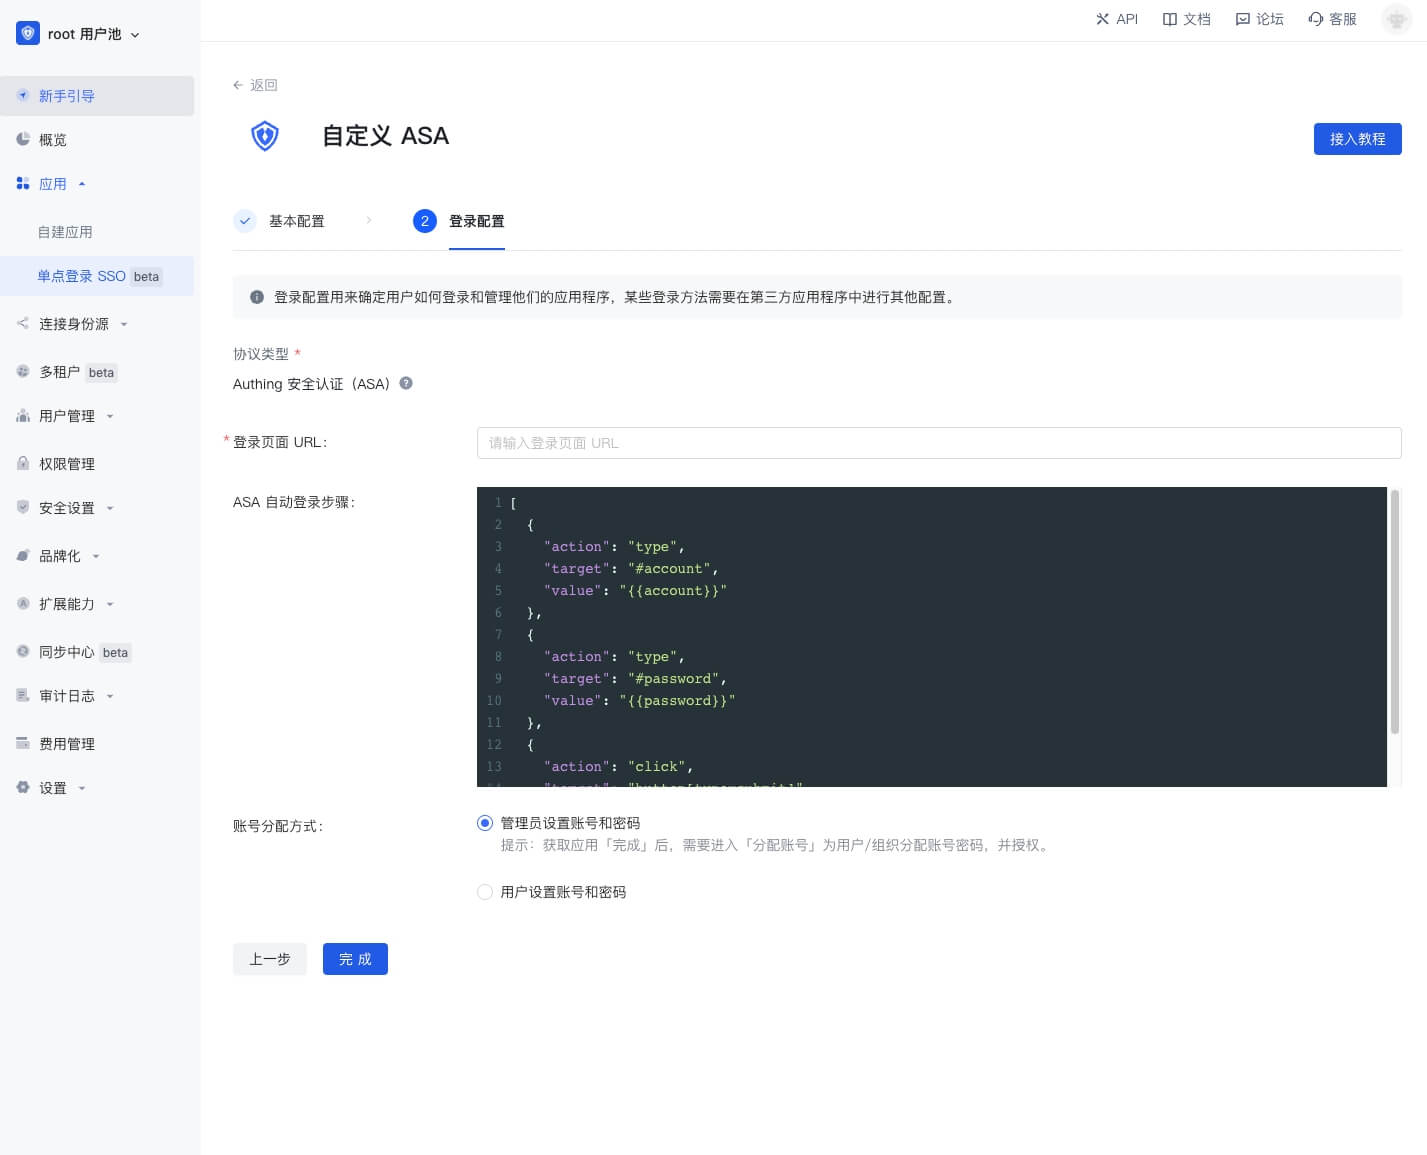
Enter the ASA configuration interface
First enter the application login page URL, such as the login page URL of "Shimo Document" is https://shimo.im/loginByPassword.
Then fill in the ASA automatic login steps. The automatic login steps must be a valid JSON string and an object array. The ASA plug-in will perform object operations in sequence according to this array. All keys of the objects in the array are as follows:
- action: indicates the operation type of the current step, all operation types are
- type: input, such as input account
- click: click, such as clicking the login button
- selectFrame: switch iframe, some website login boxes are nested in iframes, at this time, you need to switch to the iframe where the login box is located to enter the account and password to log in
- wait: wait for a certain time, such as some web pages need to wait for a certain time before clicking the login button after entering the account and password
- target: indicates the operation target of the current step, the value is a string, accepts all dom element selectors that querySelector can accept, such as
#password - value: indicates the operation value of the current step
- When used in the type operation, the value is a string, and
{{account}}can be used to indicate the bound account,{{password}}indicates the bound password - When used in the wait operation, the value is a number in milliseconds, such as 1000 means waiting for 1 second
- When used in the type operation, the value is a string, and
- action: indicates the operation type of the current step, all operation types are
- The account allocation method currently only supports Administrators setting accounts and passwords
Click "Finish" and assign an application account to the user on the account allocation page
On the access authorization page, select "Allow all users to access"

You can [experience login](#experience login) later