GenAuth Gateway Filling
GenAuth Gateway Filling uses the gateway provided by GenAuth to proxy the application service, and performs backend filling operations by intercepting login, logout and other APIs. This method is safer than ASA Form Filling. Users do not need to install browser plug-ins, which is more convenient to use. However, for applications that require human-machine verification (such as graphic verification codes), the gateway filling does not yet support filling verification codes.
Administrators can assign application accounts and passwords to users. GenAuth encrypts the account and password and stores them in the database. When a user accesses the login interface of an application that has been assigned an account and password, the GenAuth gateway intercepts the request, automatically fills in the account and password in the gateway, and logs in. End users only need to log in to GenAuth to directly access the assigned application.
How to use
Deploy GenAuth Gateway
Before using the GenAuth Gateway proxy filling capability, you need to deploy the GenAuth Gateway first. For details, please consult GenAuth pre-sales staff.
Connect to the gateway
Open the GenAuth console, enter the Application -> Self-built application menu, and select the Gateway management tab. 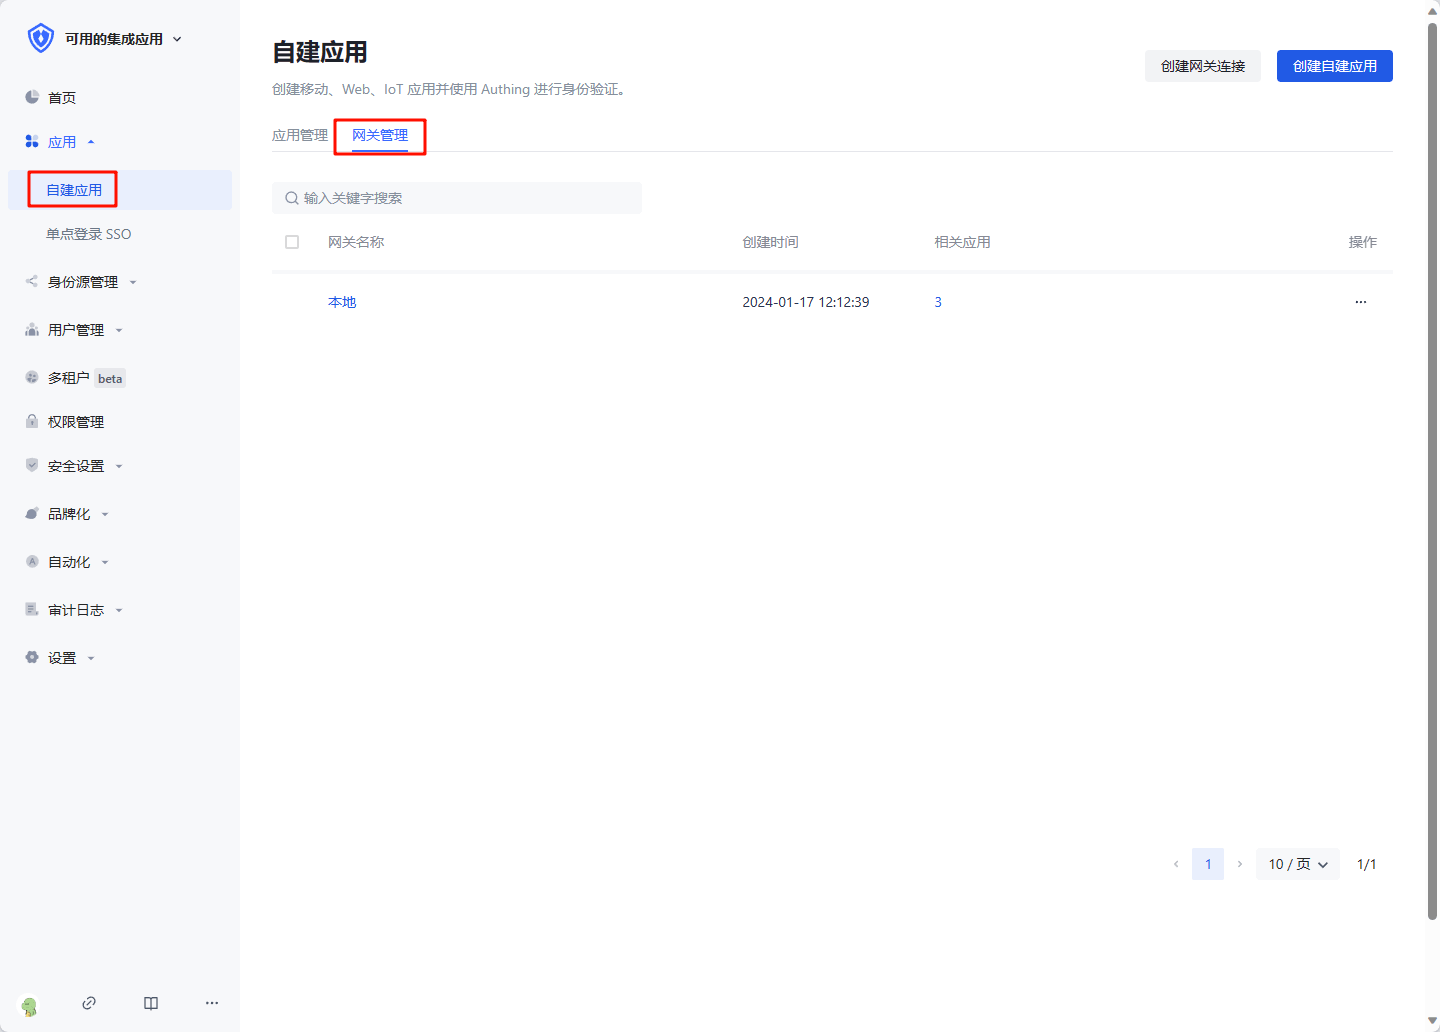
Click Create gateway connection, enter the gateway information, where Gateway management backend address is the management interface address of the gateway after the gateway is deployed. Click Create to complete the creation. 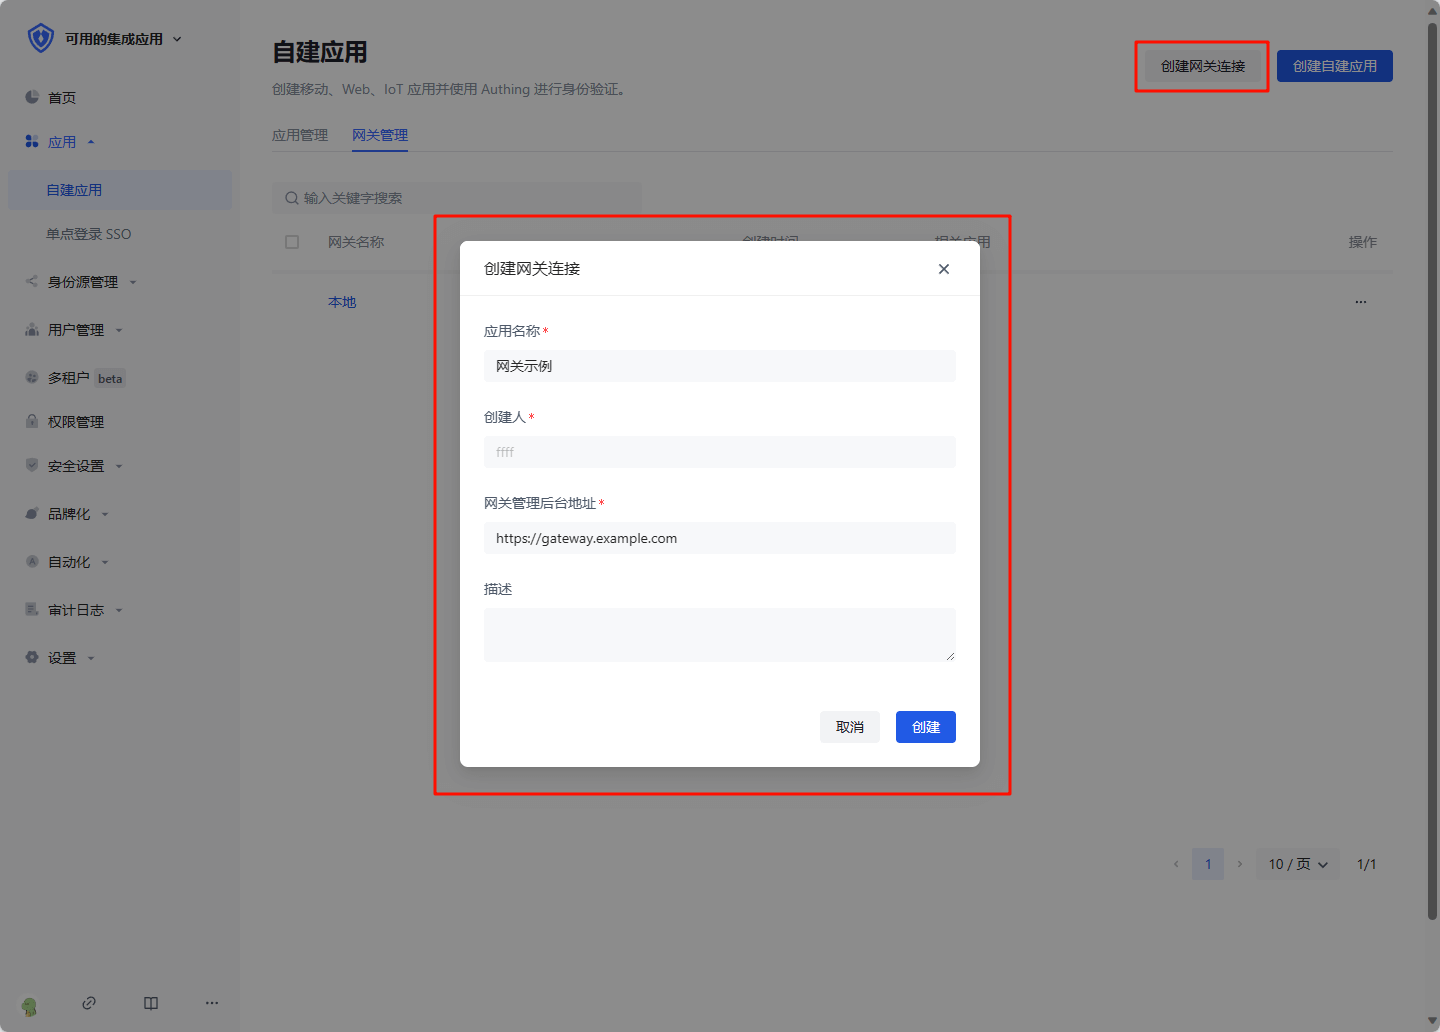
Create a gateway proxy filling application
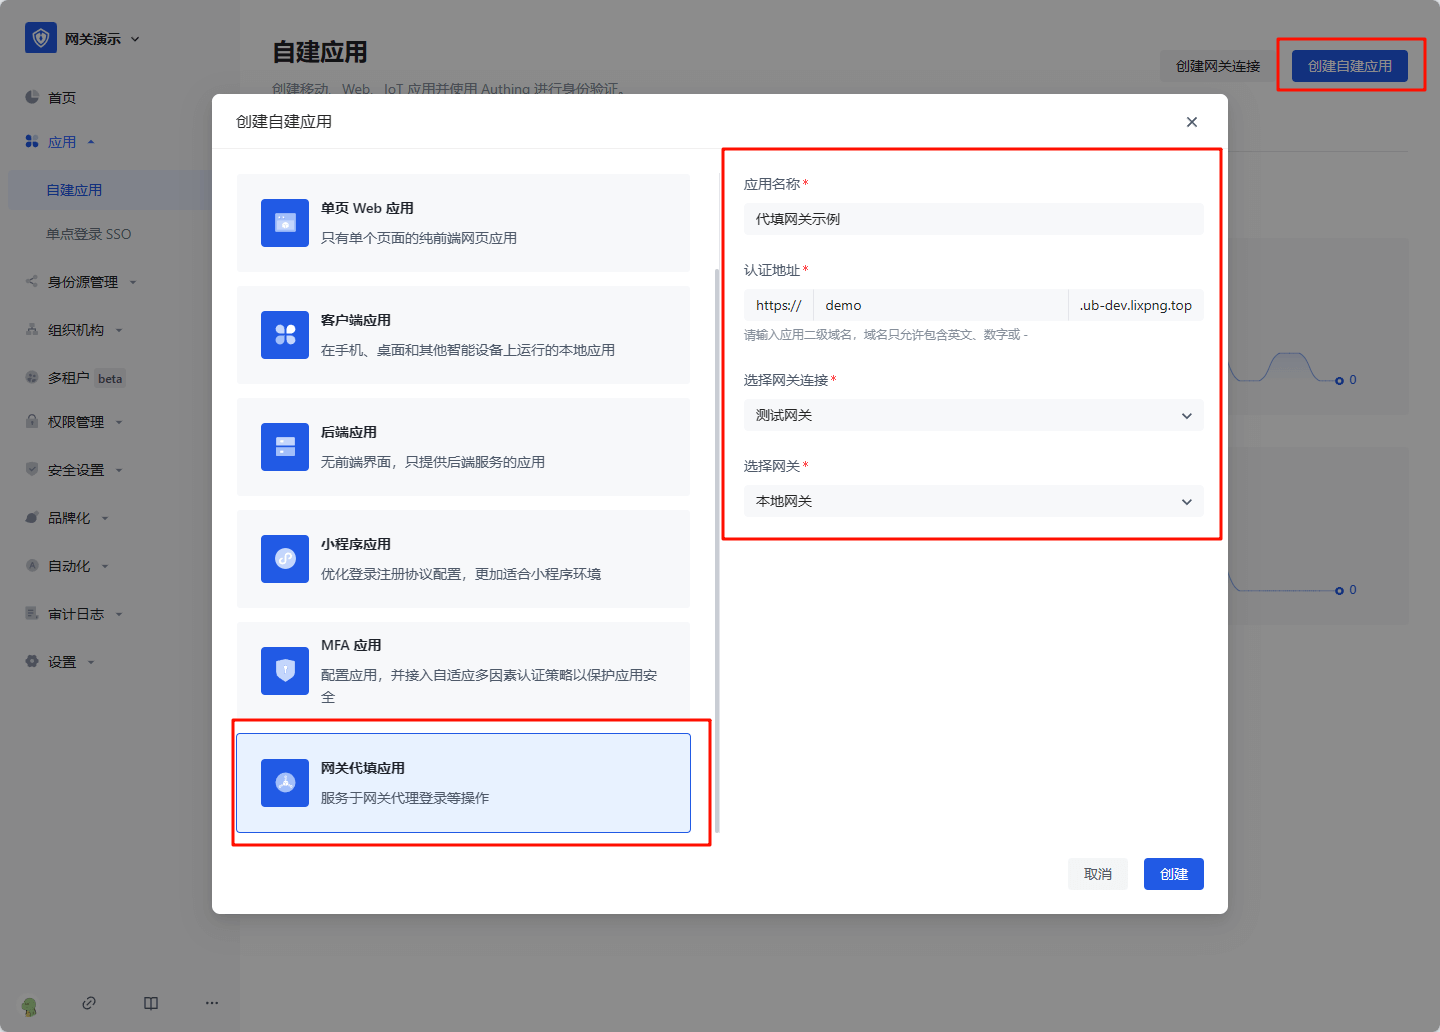
Click Create self-built application, select Gateway proxy filling application, fill in the application information, and click Create to complete the creation.
Configure proxy filling strategy
Basic configuration
After creation, enter the application details, enter the Proxy filling strategy tab, and fill in the configuration information:
- Target application URL: the access address of the application that needs to be filled in, which must include the protocol, domain name (IP), and port
- Application proxy URL: the address that the user actually accesses after being proxied, which must include the protocol, domain name, and port
- Application login address: When login is required, the page address accessed by the user, the GenAuth gateway will intercept this page, and perform proxy login operations in the gateway
- User logout address: When the user manually logs out, the API address accessed, the GenAuth gateway will intercept this interface and clear the GenAuth login state
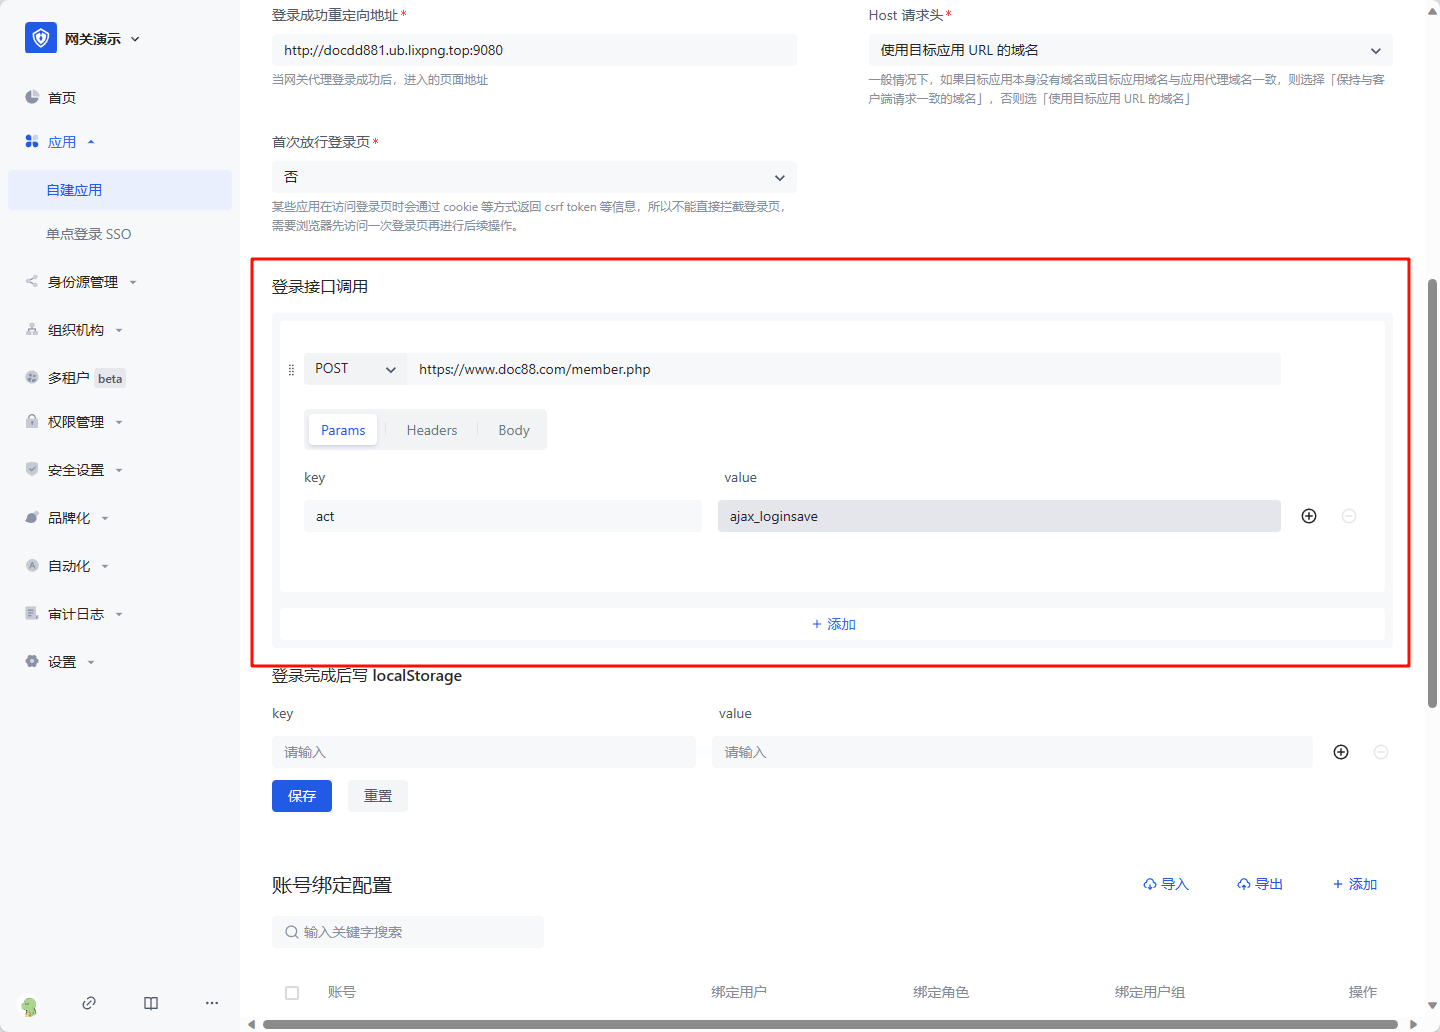
- Login successful redirection address: When the gateway proxy login is successful, the page address entered, generally fill in the application homepage
- Host Request header: In general, if the target application itself does not have a domain name or the target application domain name is the same as the application proxy domain name, select "Keep the domain name consistent with the client request", otherwise select "Use the domain name of the target application URL"
- First release login page: Some applications will return information such as csrf token through cookies when accessing the login page, so the login page cannot be intercepted directly. The browser needs to access the login page once before performing subsequent operations

Login interface call
The login interface call configures the interface address and parameters called when the user enters the username and password and clicks the login button. The gateway will simulate this process. You can add multiple requests. In each request, you need to select the request method, enter the request address, and optional Params (parameters concatenated to the request URL), Headers (request headers), and Body (request body). In the value of Params, Headers, and Body, you can use variables. For example, if you need to get the user's bound account: ${bound_account.account}. All variables are as follows:
- bound_account.account: the account to which the user is bound
- bound_account.password: the password to which the user is bound
- cookie: request cookie, such as
${cookie.xxx}represents the value of request cookie xxx - api_respN.body.xxx: the value of xxx in the response to the Nth login request, where N is an increasing integer starting from 1, representing the Nth login request
Write localStorage after login is completed
For some single-page applications, after successfully calling the login interface, token information needs to be written to localStorage, and this information needs to be configured. The ${api_respN.body.xxx} variable can also be used in value 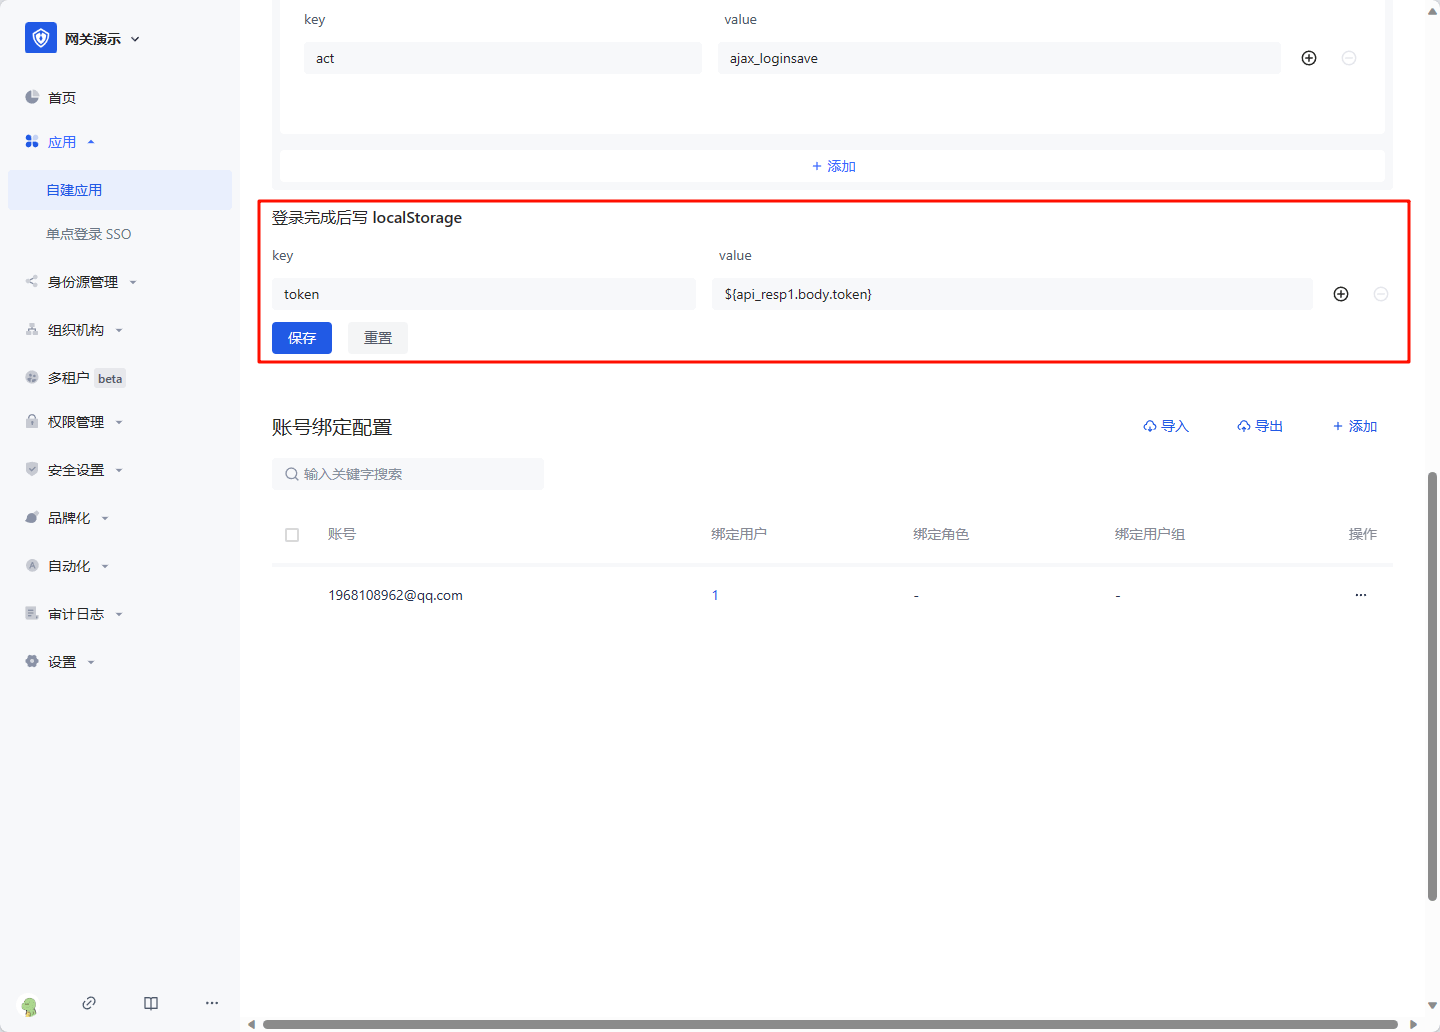
Click Save after configuration is completed.
Bind an account
Click the Add button in Account Binding Configuration, enter the real account and password of the replaced application, and click OK to create it successfully. 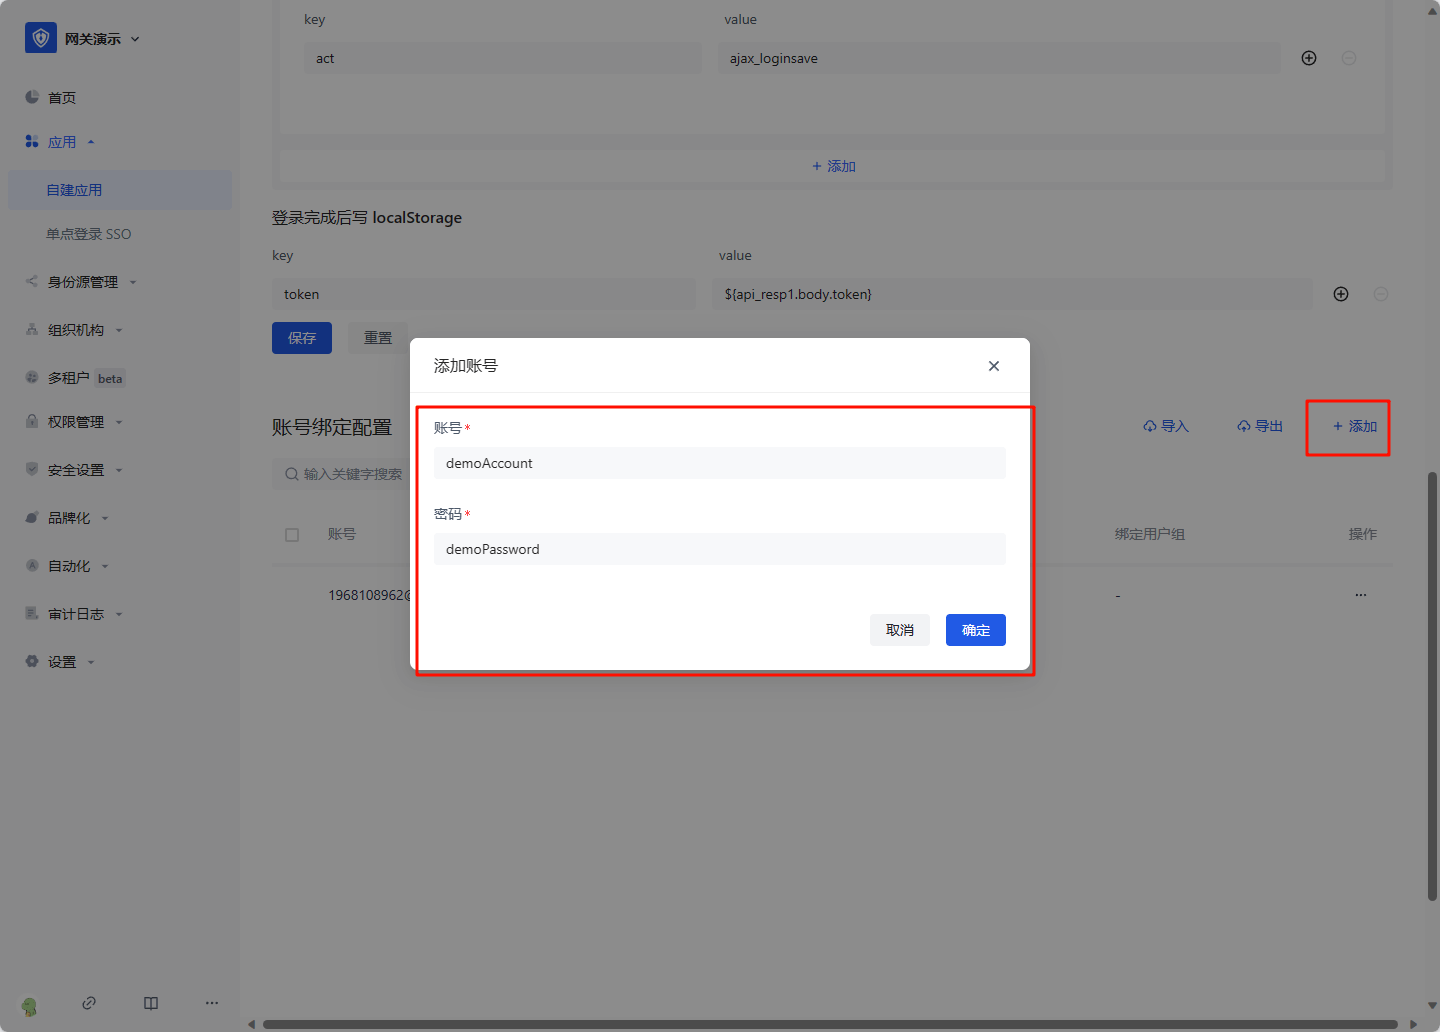
Click Account Configuration, click Account Binding. 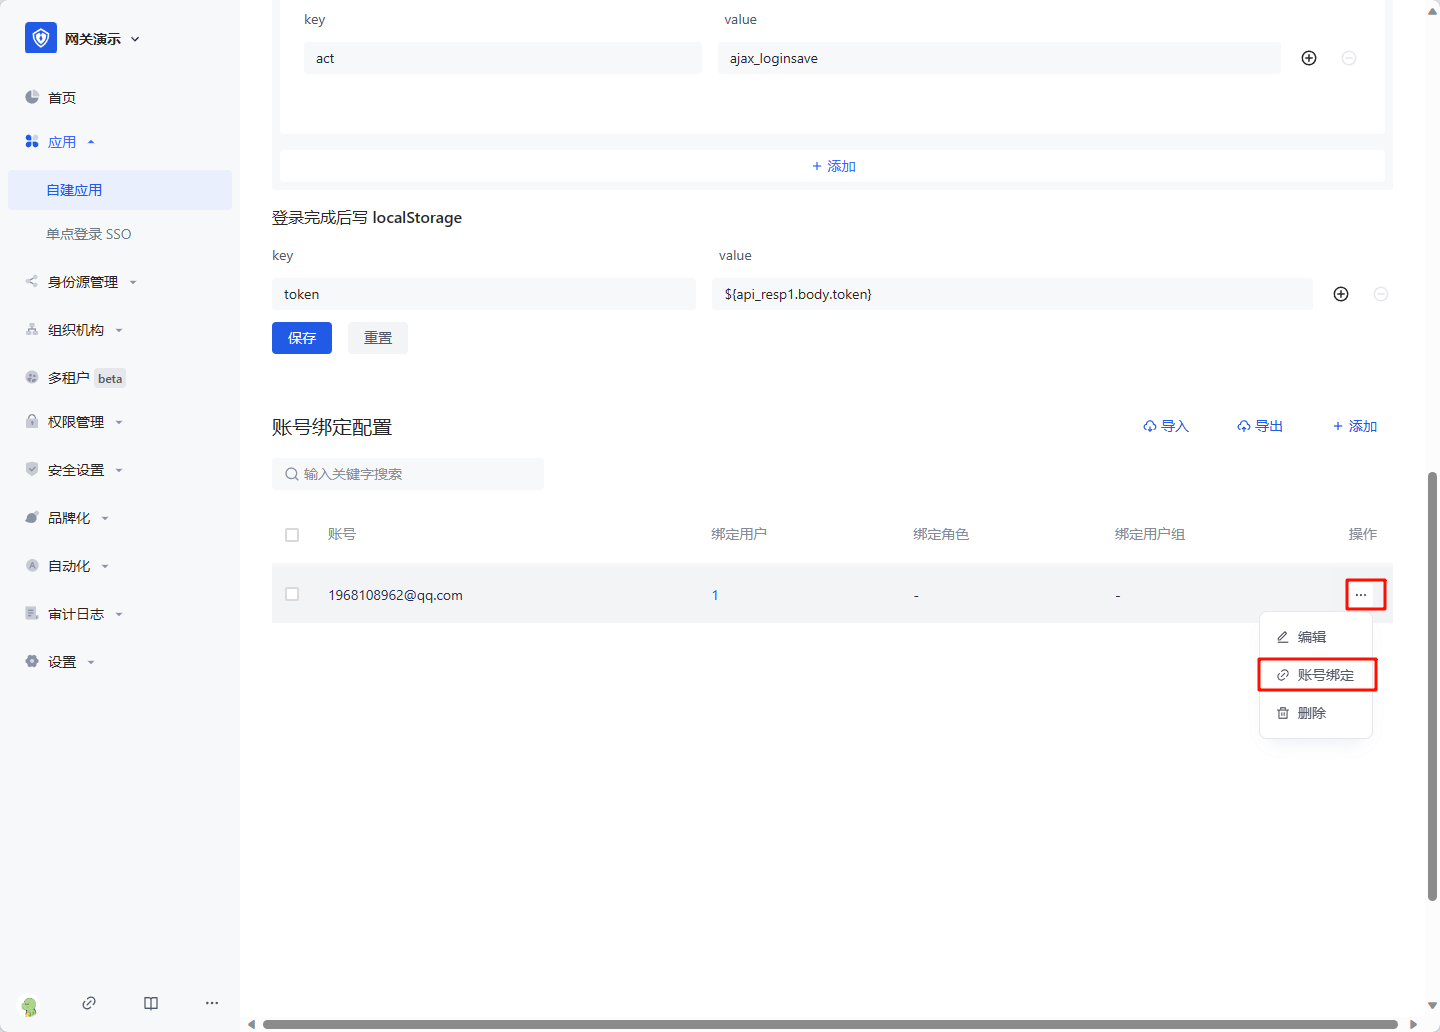
Select the user, role or user group that needs to log in with this account, and click OK to complete the configuration. 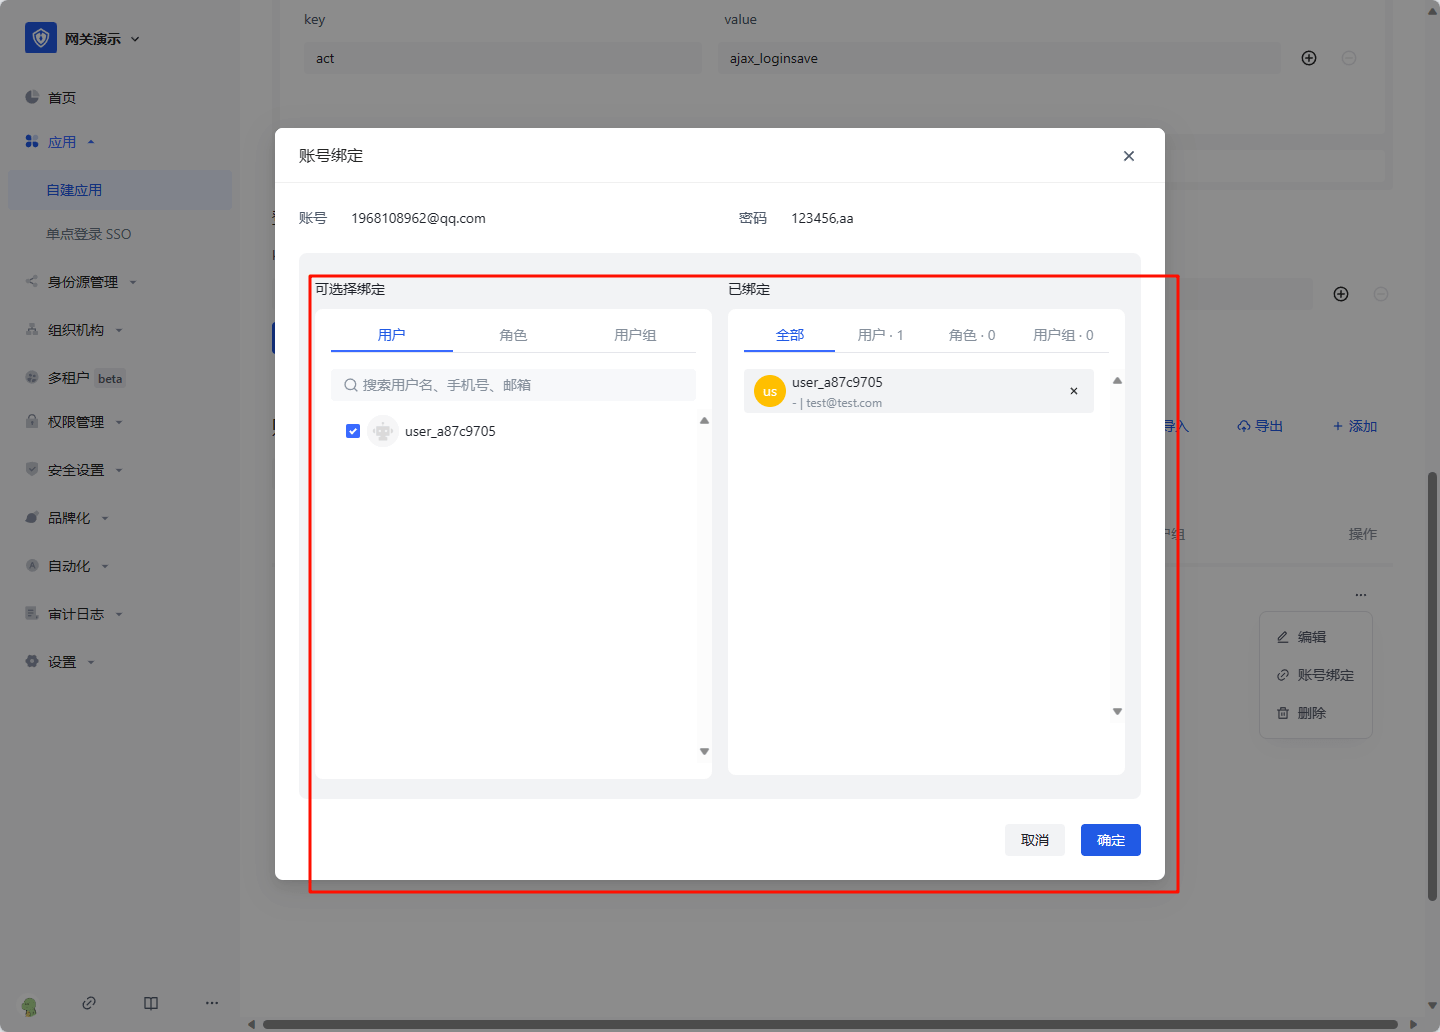
On the access authorization page, select "Allow all users to access" 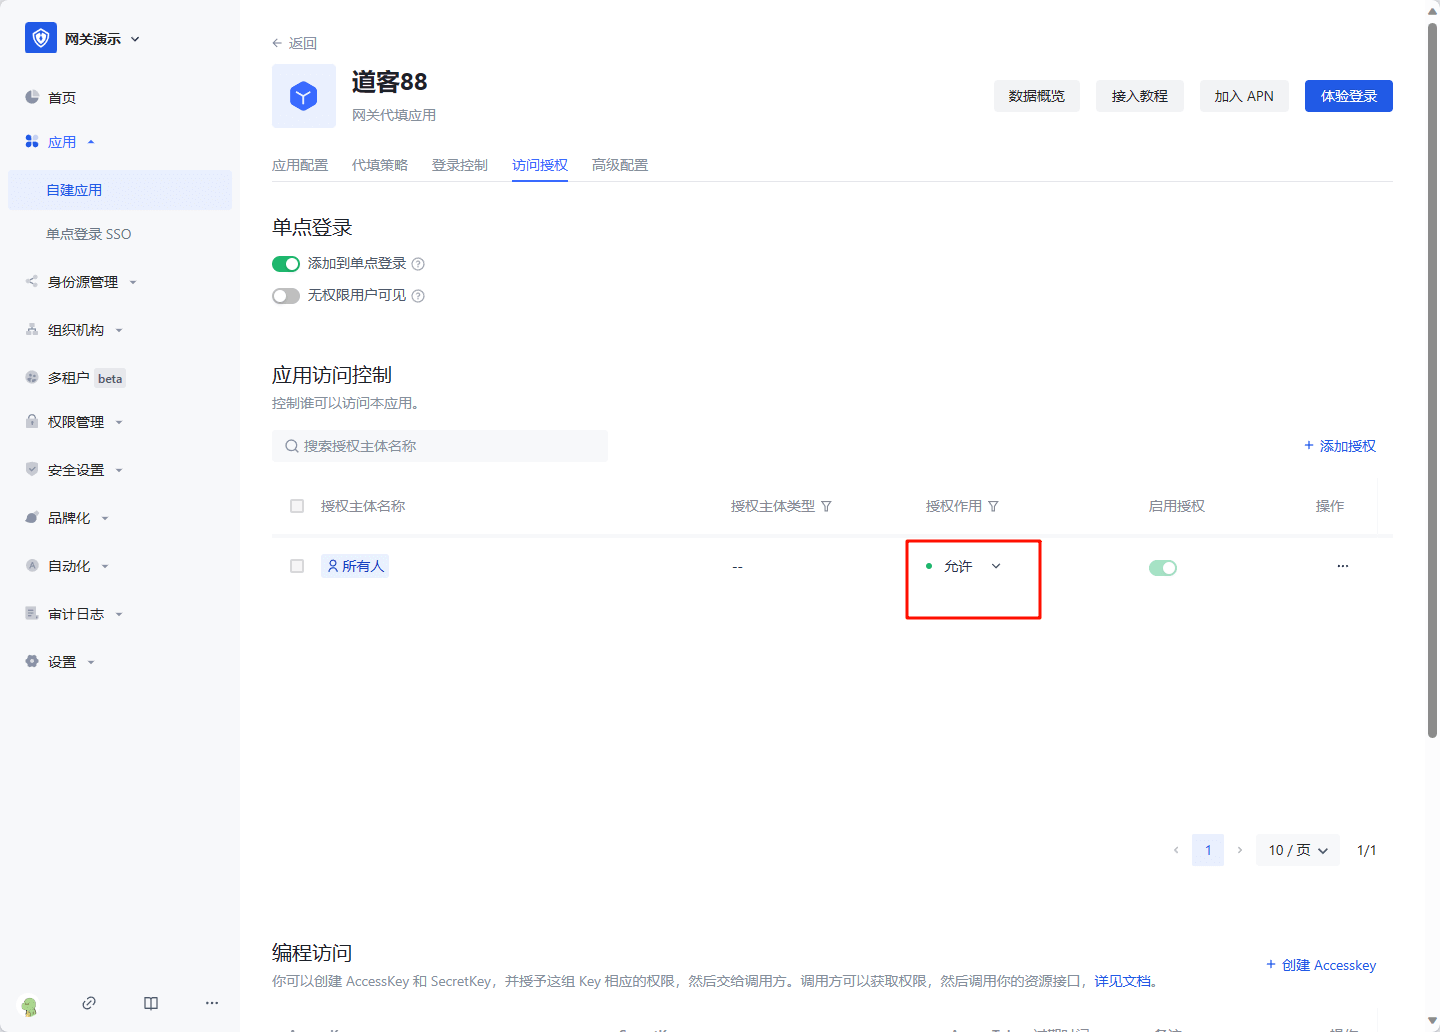
Then you can experience the login.